NOTE: This article has been updated and moved to the Codeless Platforms Documentation Portal.
If you are seeing this message and have not been redirected, click: How to Use an Office 365 Account for Send Email (SMTP) and BPA Platform Notifications.
<!–
Introduction
As most people know TaskCentre has an inbound and outbound SMTP capability and traditionally this has worked in conjunction with the company on-premise Exchange SMTP mail server. With more customers now moving over to hosted services in the cloud the inevitable question is “Can TaskCentre provide the same functionality using hosted SMTP services?”
This knowledge base article addresses that question and discusses both inbound SMTP triggers and outbound SMTP email delivery with mail relay enabled.
Email Outbound From TaskCentre
We begin with outbound SMTP flow where TaskCentre is required to send email though Office 365 hosted facilities.
Outbound SMTP from TaskCentre to Office 365 is relatively straightforward.
TLS authentication is required and is directed to port 587 instead of port 25 used when Exchange is hosted on-premise. Open the Send Email (SMTP) output configuration in Tools/Output. Take note of the configuration in the screenshots. We have used an account called “TaskCentre” to provide the TLS authentication. Note: Domain name is not required.
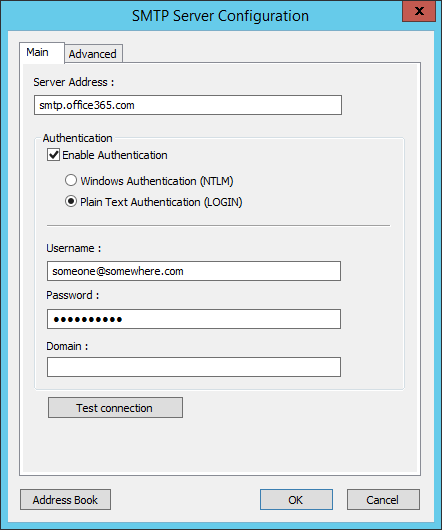
Figure 1. Send Email (SMTP) Global Configuration – Main Tab.
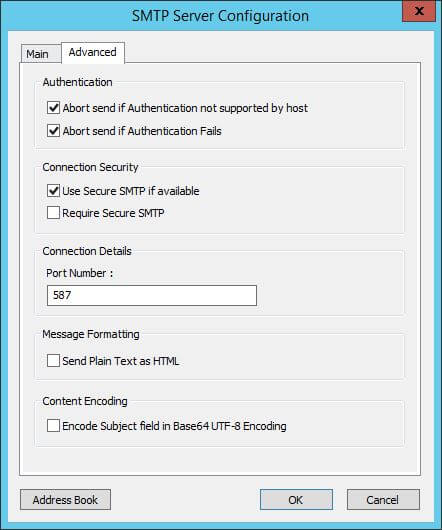
Figure 2. Send Email (SMTP) Global Configuration -Advanced Tab.
There is a relay restriction of 10,000 emails per day imposed on TaskCentre by Office 365. If your requirement is likely to exceed that quantity then you should look at deploying a local SMTP server using IIS for delivery.
Email Inbound To TaskCentre
In the past when using on-premise Exchange SMTP services, if a user wished to trigger a task based on the content of an inbound email, then an email routing would be set up using a contact name and a specific address space. This would have the effect of forwarding a subset of email onto the TaskCentre server machine which hosted a Microsoft SMTP Virtual Server running under IIS.
Similar principles apply when using hosted SMTP services. The administrator must configure an outbound connector which identifies a specific address space and routes email onto the TaskCentre server. In order to use this connector you must complete the following:
- Set up a DNS MX record that identifies the domain name that you require and maps this to the external IP address that will be used by the IIS SMTP virtual server machine.
- Register a sub domain name in order to filter mail destined for TaskCentre server away from email destined for Office 365 mailboxes.
Once the sub domain name has been established together with registration of the IP address then the administrator can commence work on configuring the outbound connector.
1. In the Office 365 Admin Center,under Admin click Exchange in the navigation pane on the left. This will open the Exchange AdminCenter within another window.

Figure 3. Office 365Admin Center- Locating ‘Exchange’.
2. Within the Exchange AdminCenter click Mail Flow in the navigation pane on the left followed by Connectors in the menu bar at the top.
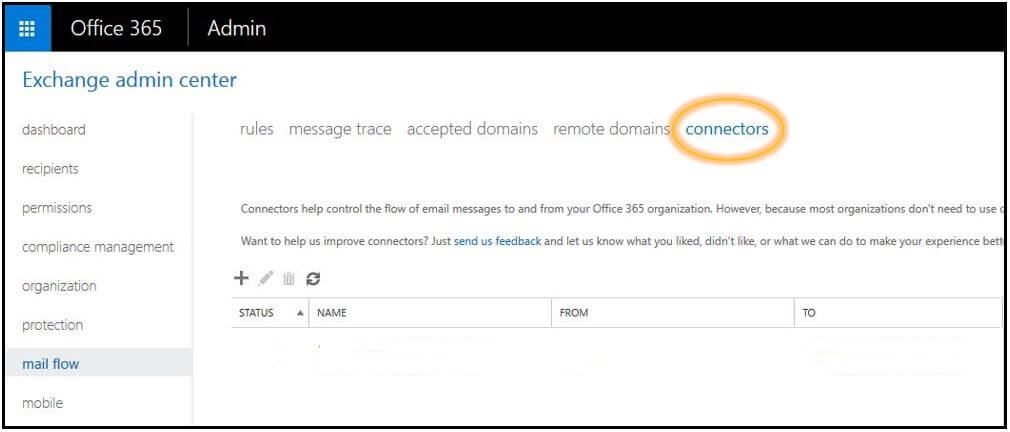
Figure 4. Exchange Admin Center – Locating ‘Connectors’.
3. Click the ![]() symbol to open the Select your mail flow scenario dialog.
symbol to open the Select your mail flow scenario dialog.
4. Using the From drop down list, select Office 365.
5.Using the To drop down list,select Your organization’s email server .
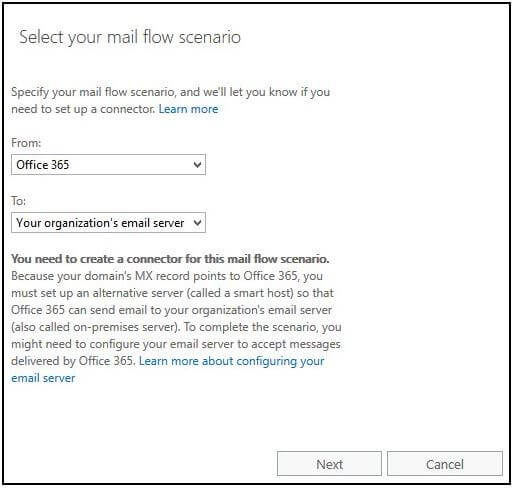
Figure 5. Specifying your mail flow scenario.
6. Click Next to continue to naming the connector.
7. In the Name field, enter a descriptive name for the outbound connector .
8. In the Description field, enter descriptive information about the outbound connector.
9. For the connector to work both tick boxes at the bottom will need to be enabled.
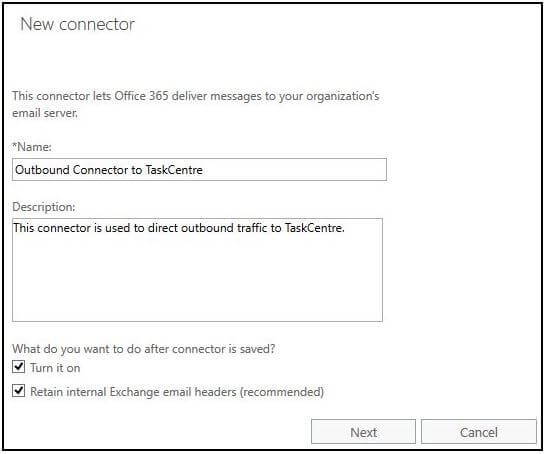
Figure 6. Naming and describing the new connector – Example displayed.
10. Click Next to continue to setting when the connector will operate.
11. Select the option Only when email messages are sent to these domains.
12. Click the symbol then type in your sub-domain name. In our example this is “taskcentre.mydomain.com” . This identifies the address space specific to TaskCentre. Only email destined to TaskCentre will now flow through this connector.
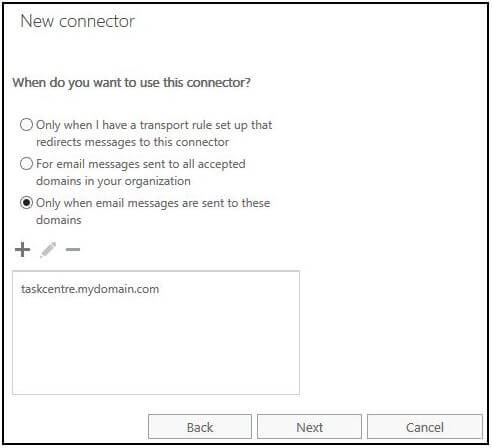
Figure 7. Specifying the TaskCentre domain – Example domain displayed.
13. Click Next to continue to setting how emails will be routed.
14. Click the ![]() symbol then specify the public IP address of your TaskCentre server.
symbol then specify the public IP address of your TaskCentre server.
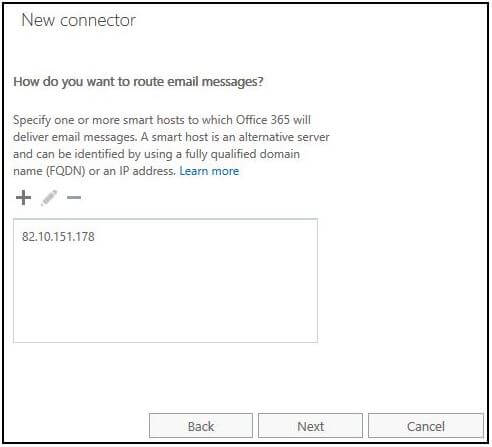
Figure 8. Specifying the TaskCentre server public IP address – Example IP displayed.
15. Cick Next to continue to setting how Office 365 connects to your email server.
16. The Transport Layer Security (TLS) Settings section allows you to configure whether emails will be sent securely or not.
We recommend setting up opportunistic TLS initially to ensure the TLS does not impact your outbound email flow. This means that an encrypted connection will always be attempted first, but if this cannot be established, the connection falls back to unencrypted communication.
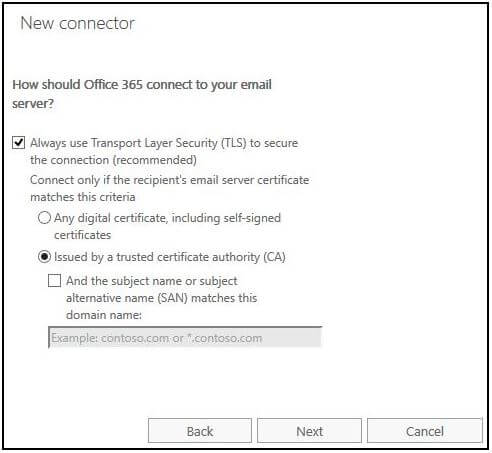
Figure 9. Specifying the use of TLS.
17. Click Next which will allow you to confirm your configuration settings.
18. Clicking Next once more brings you to the last step. Here you can test your connector by clicking Validate, an email address must be supplied for a test email to be sent. Once complete you click Save which will add the connector to the Connectors list indicating it as active.
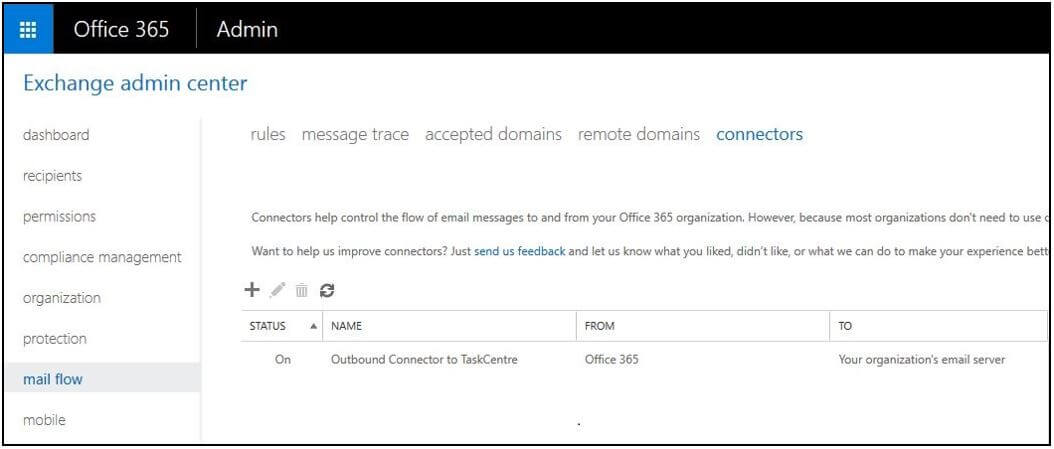
Figure 10. New connector now added – Example connector shown.
This completes the configuration of the Office 365 outbound connector. We should now consider configuration of IIS on the TaskCentre server.
IIS Virtual SMTP server
19. Set up IIS SMTP virtual server on Windows 2008 TaskCentre Server machine using the reference article: http://msdn.microsoft.com/en-us/library/8b83ac7t(v=vs.100).aspx
20. Ensure the DNS record identifies this machine by its registered external IP address.
21. Ensure that the Email Trigger (SMTP) agent has been installed and configured correctly on the TaskCentre server machine.
Testing
22. It should now be possible to send an email through Office 365 addressed to your sub domain in our case ‘taskcentre.mydomain.com’ and for this to be routed to the TaskCentre server using the MX record triggering a task to run where the email filter criteria equates to true.
Housekeeping
23. Administrators may decide to use the TaskCentre File Management tool to purge emails that remain in the drop folder under IIS after the trigger opportunity has been met. This is in cases where the email is not delivered to a final destination and is used solely to trigger a task runtime opportunity.
–>