Introduction
The Import XML Document tool imports an XML document to be used and processed by other task steps. To validate the XML documents at runtime, you can either import an XML schema file (XSD), infer from an existing XML document, or manually construct the XSD.
Features
The Import XML Document tool provides the following features:
- Ability to import XML document content from Google Drive, OneDrive and SharePoint Online
- Ability to import XML document content from the local file system
- Ability to save partially configured connections
- Browse for and select an XSD file to be used as the XML schema for the step
- Browse for and select an XML file to be used as the XML schema for the step and then automatically infer the schema from the XML file content
- Copy and paste valid XML into the step and then automatically infer the schema from the XML content
- Validate the schema once prepared
- Manually create a new schema or edit an existing one
- Specify the source file properties to be extracted at Task run-time and exposed to other steps through the Task Browser
- Preview the schema structure before saving and running the task
- Output XML for use by other task steps
- Output XML as a string for use by other task steps
White Paper - Import XML Document
Working with other Tools
The Import XML Document tool can directly interact with the following tools:
Consuming from Other Tools
The Import XML Document tool can consume objects directly outputted by the following tools:
| Icon | Tool Name | Tool Category |
|---|---|---|
| Import Flat File | Input | |
| Import XML Document | Input |
Video Overview
Objects Consumed
The above tools output the following objects with can be directly consumed by the Import XML Document tool:
- XML — XML data from any BPA Platform tool capable of exposing such data (see above)
Exposing to Other Tools
The following tools can directly consume output from the Import XML Document tool:
| Icon | Tool Name | Tool Category |
|---|---|---|
| Import Flat File | Input | |
| Import XML Document | Input | |
| Retrieve Text Message | Input | |
| Convert XML to Recordset | Format | |
| Format as Flat File | Format | |
| Run Microsoft Reporting Services | Format | |
| Transform Data | Format | |
| Save File | Output | |
| File Management | General | |
| Applications Platform Connector | Data Connectors |
Objects Exposed
The following objects are outputted by the Import XML Document tool and can be directly consumed by the above tools:
- InputData — This object is only available if an XML file is consumed from a previous task step. It contains the imported XML.
- FileProperties — This object exposes the source file’s
Name, Size, Type, DateModified, DateCreated, DateAccessed, andAttributesproperties collected at task run-time. You can set which properties are exposed in the File Properties dialog box. - OutputXML — This object exposes two sub-objects:
- Output Schema — This contains the XSD file for the output
- Output XML — This contains the XML produced by the Import XML Document tool
- ImportedFileDetails — This object exposes two sub-objects:
- Path — Whether the XML document was specified or sourced from a previous task step, this is the folder path of the imported XML document
- FileName — Whether the XML document was specified or sourced from a previous task step, this is the imported XML document
Global Configuration
The global configuration for the Import XML Document tool is used to create connections to selected external file and cloud-based storage providers, such as SharePoint Online, OneDrive, or Google Drive.
You access the Import XML Document – Global Configuration interface from the resources tree — expand System > Tools > Input and double-click Import XML Document in the items list.
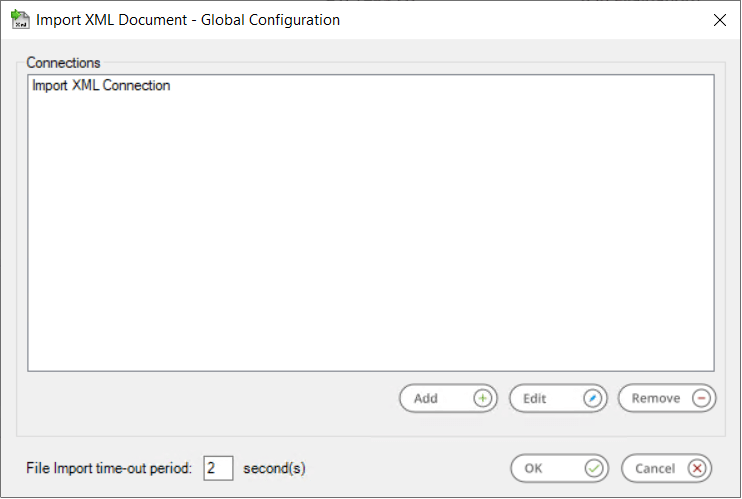
Click Add to create a new connection to external file storage, or one of the supported file system providers.
Use Edit and Remove to manage your existing connections.
The File Import time-out period determines how long the Import XML Document tool will attempt to import a file. If the file cannot be imported, after the defined import time-out period, an error is written to the Event Log. The default period is 2 seconds.
Creating Import XML Document Connections
Provide details and establish connection to an external file system.
About the General Node
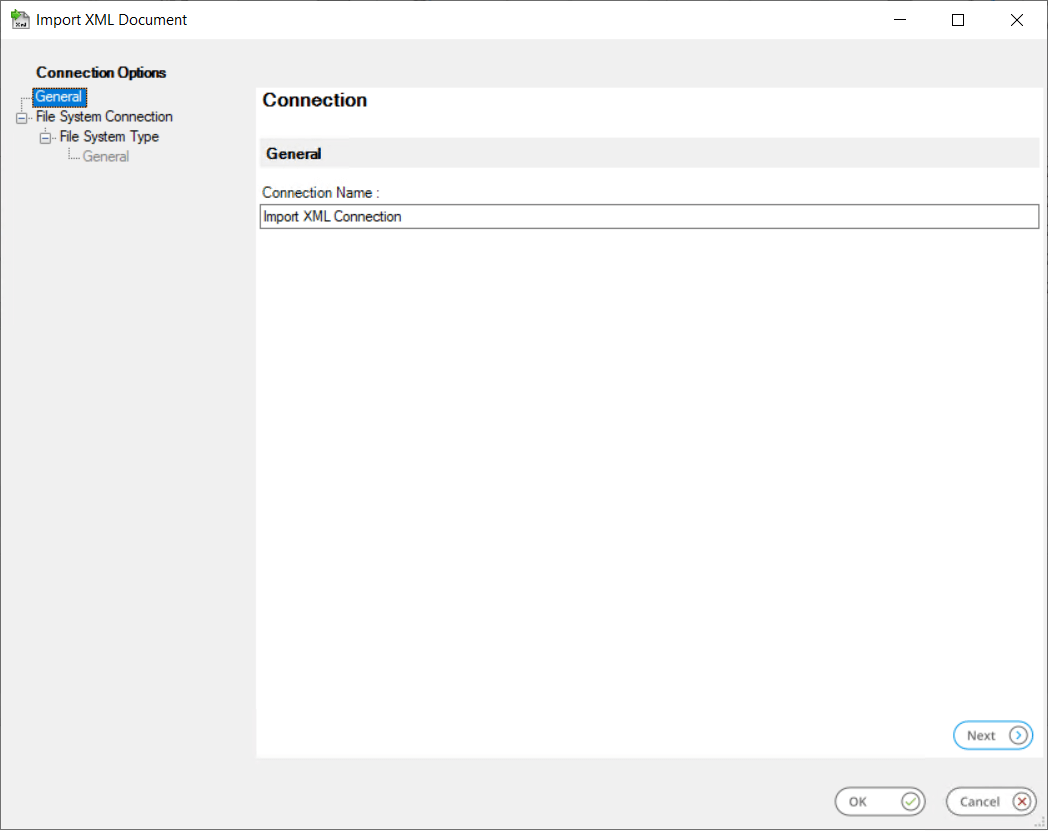
Enter a unique Connection Name for the Import XML Document connection. If adding connections for different types of file system provider, it is recommended you add such details to the connection name to enable you to identify each connection.
About the File System Connection Node
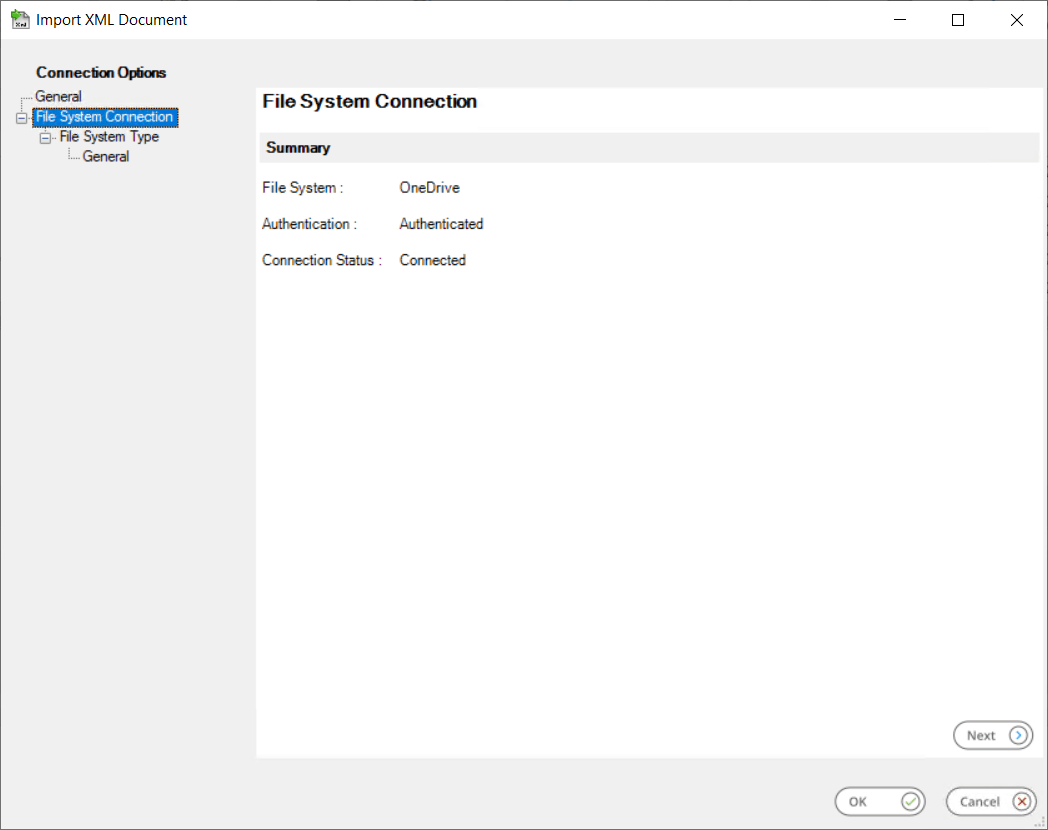
The File System Connection node, selectable in the Connection Options tree, provides a summary of the connection settings which have been defined in the subsequent File System Type and General node pages. Where no configuration has taken place, the default values for each field will appear as Unknown.
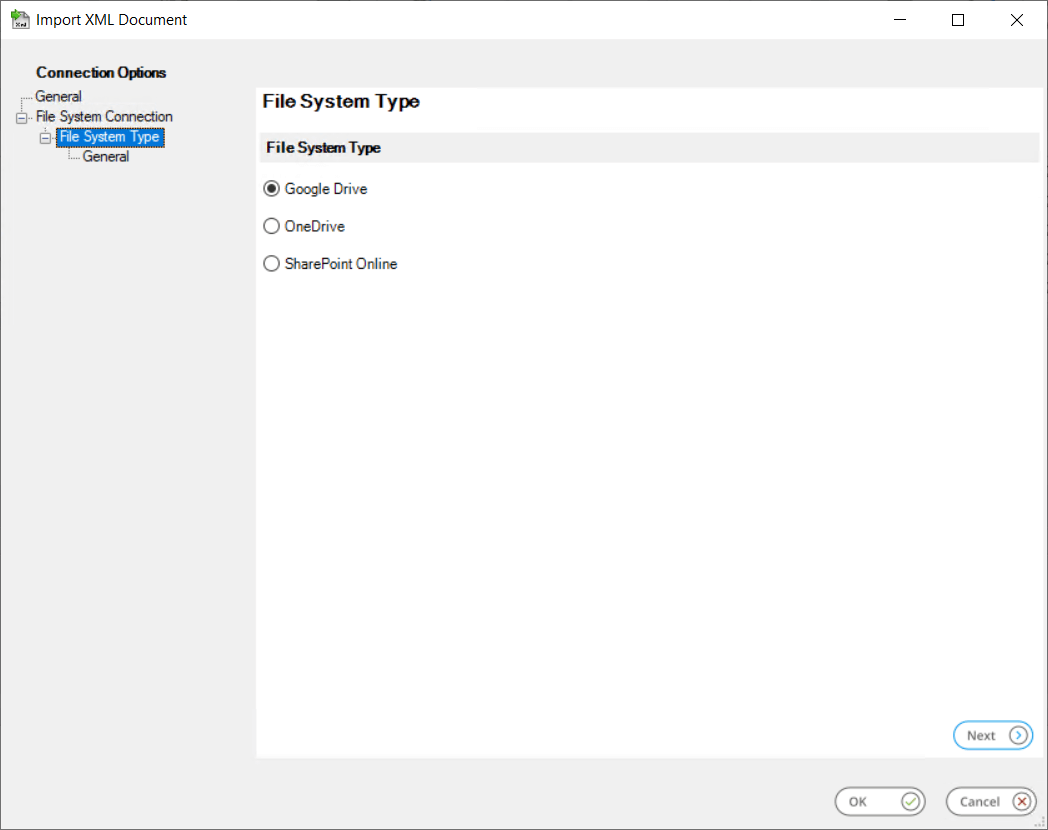
About the File System Type Node
The required File System Type can be selected from the list of supported external file storage providers.
About the File System Type > General node
Following the selection of an external file storage provider type the General node will be enabled.
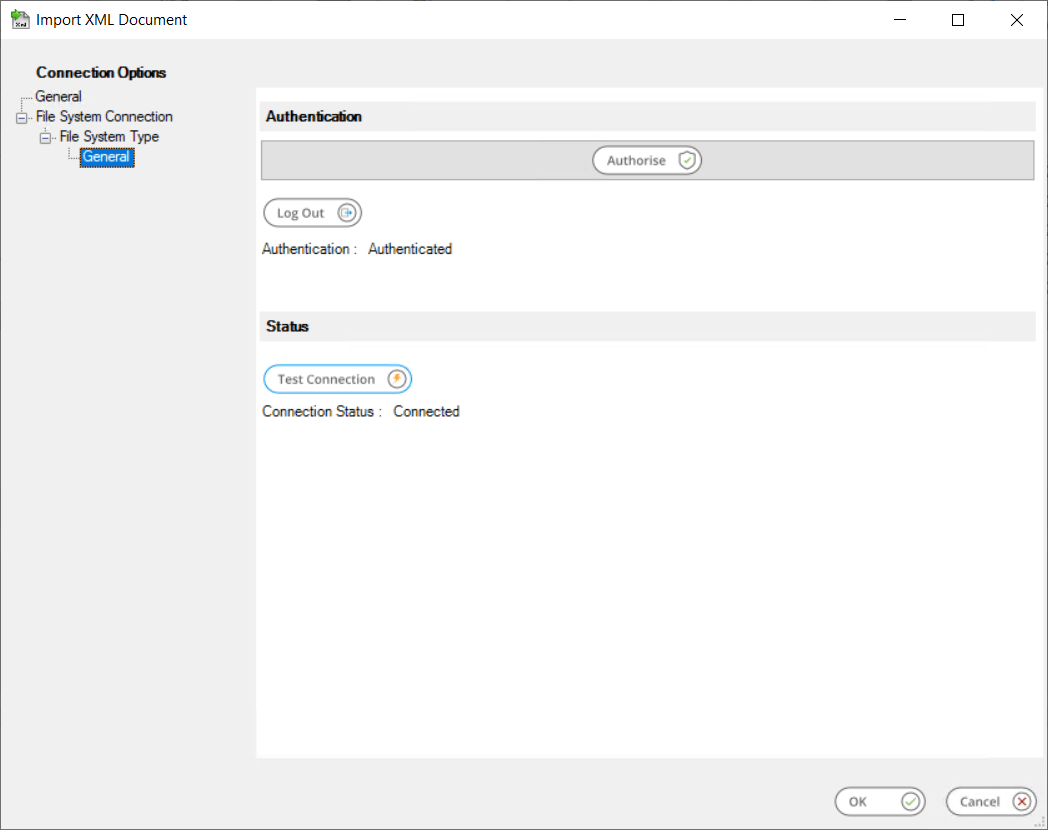
Click Authorise to open the selected storage provider’s login panel. This dialog is managed by the storage provider and displays the fields required to complete modern or multi-factor authentication to your account with them.
The Log Out button can optionally be used to disconnect an established connection. The authorisation process must be repeated if reconnection is subsequently required.
Step Configuration
To add a new Import XML Document step to an existing task, you either:
- Click and drag the Import XML Document icon from the Task Browser to the task Design area.
- From the task’s Design tab, right-click on empty space and select Add > Input > Import XML Document.
– OR –
For a detailed description of how to create new tasks, refer to the product help.
About the General Tab
The General tab is used to Name and describe (Description) this task step.
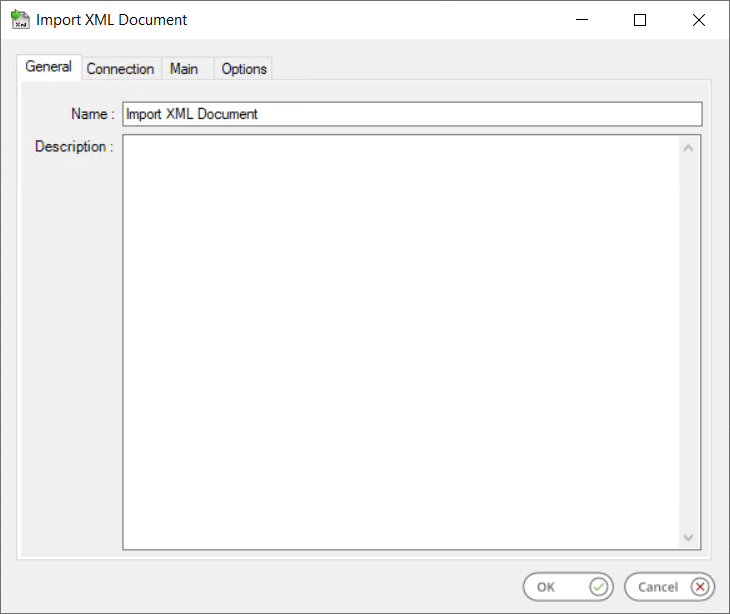
Enter a unique task step Name
The Description entry, although optional, can be used to store information relating to the Import XML Document task step.
About the Connection Tab
The Connection tab is used to establish a connection to the Import XML Document source location.
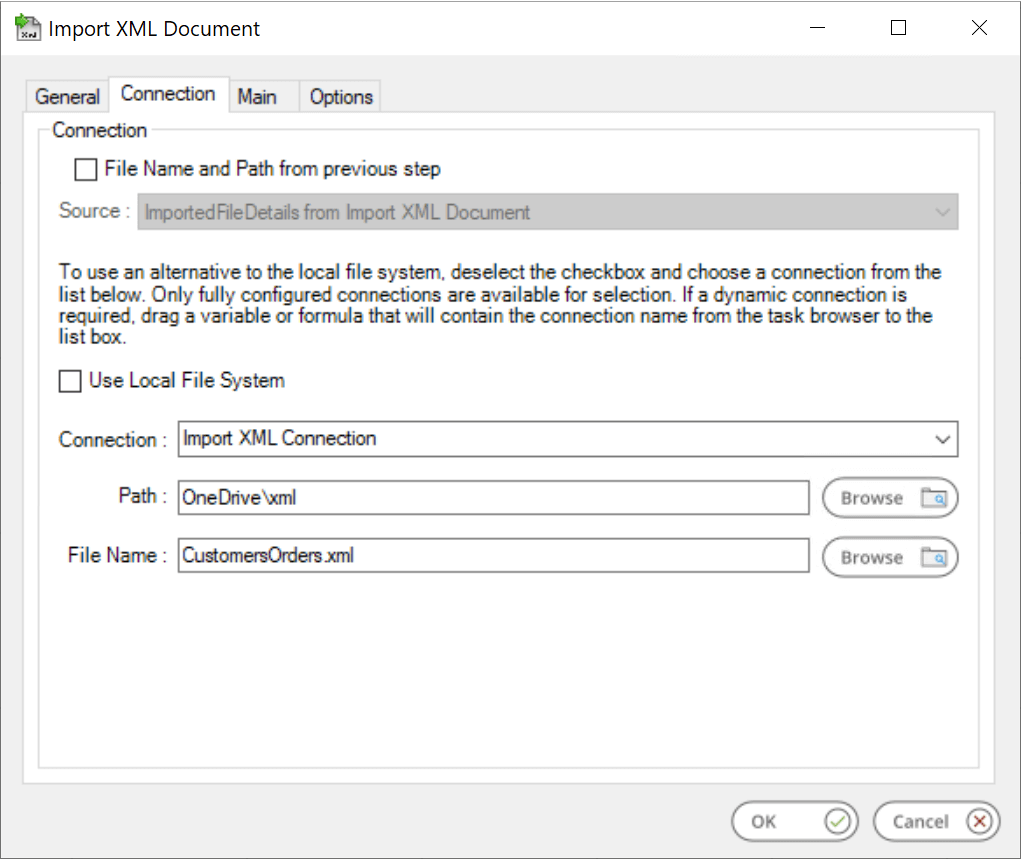
By default, the Import XML Document tool will import files located on the local file system. If connections to other file sources are available, then the step can be configured to import files from those locations. To do this, either clear the Use Local File System checkbox to enable the Connection drop-down and select from the connection settings previously set-up in the Global Configuration; or, if the original file name and path are available from the preceding steps, use a File name and path from previous step in the task.
► File name and path from a previous step — If enabled, use this option to import a document previously created or imported by another task step (see Working with other Tools).
■ Source — Contains all available task steps that have the supported document outputs.
► Use Local File System — Selected by default, this imports a file from the local system folder and file structure.
Connection — Deselect the checkbox for Use Local File System to enable the selection of external file storage connections set-up in the Global Configuration.
Use a BPA Platform variable or formula to create a dynamic connection, where the connection used is determined by runtime circumstances. At runtime, the contents of the variable must match the name of one of the global connections — this is case-sensitive. See product help for further details.
► Path — To specify the Path, manually enter the path details or click the Browse button to locate and select the required source folder. The presented folder structure is dependent on the file server or file system provider that was selected in the Connection tab.
► File Name — To specify the Filename, manually enter the filename details or click the Browse button to locate and select the required source filename. The presented structure is dependent on the file server or system provider that was selected in the Connection tab.
About the Main Tab
If required, you can define a XML schema in the Main tab to validate the imported XML document. The Import XML Document tool adheres to the industry-standard XSD format.
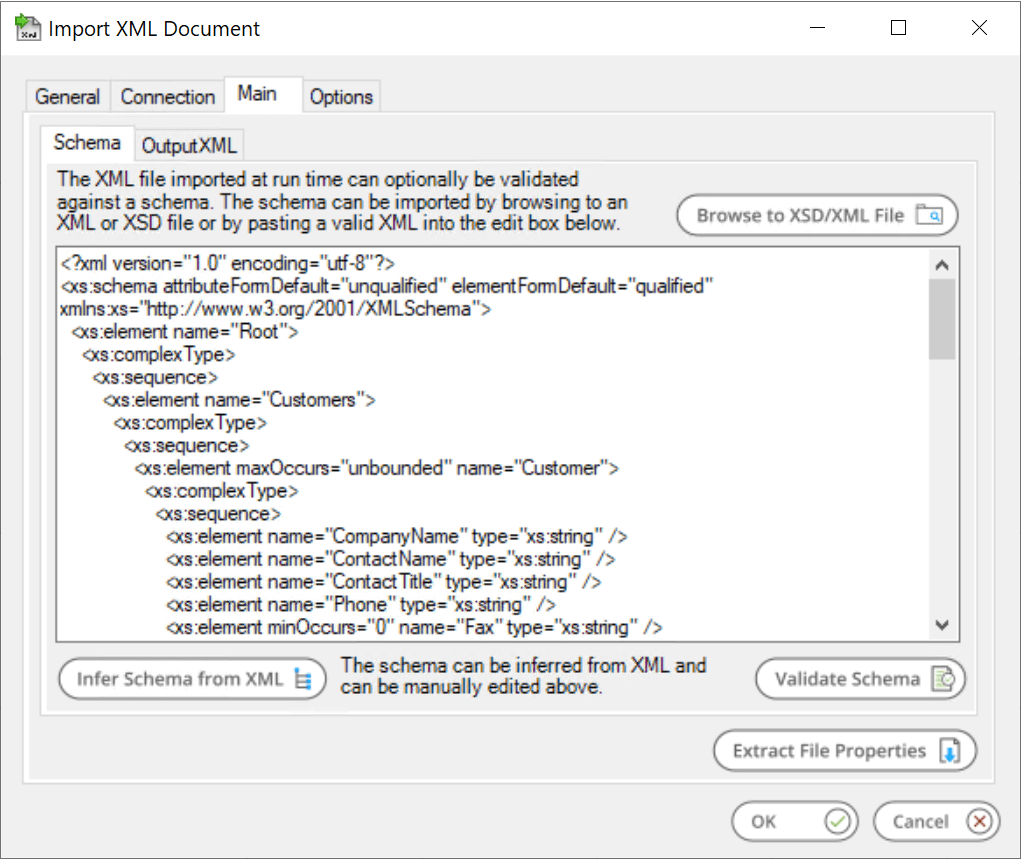
You can define the schema by:
- Manually entering it into the text box
- Importing an existing XSD file — click Browse to XSD/XML File
Click Validate Schema to ensure no errors exist in the XSD file prior to run-time.
Inferring the XML Schema
Alternatively, the Import XML Document tool can infer the schema from a sample XML document. If you have an example of the XML document imported at run-time, either:
- Copy it into the text box
- Import it into the tool — click Browse to XSD/XML File
Click Infer Schema from XML to define the XSD file, then click Validate Schema to ensure no errors exist in the XSD file prior to run-time.
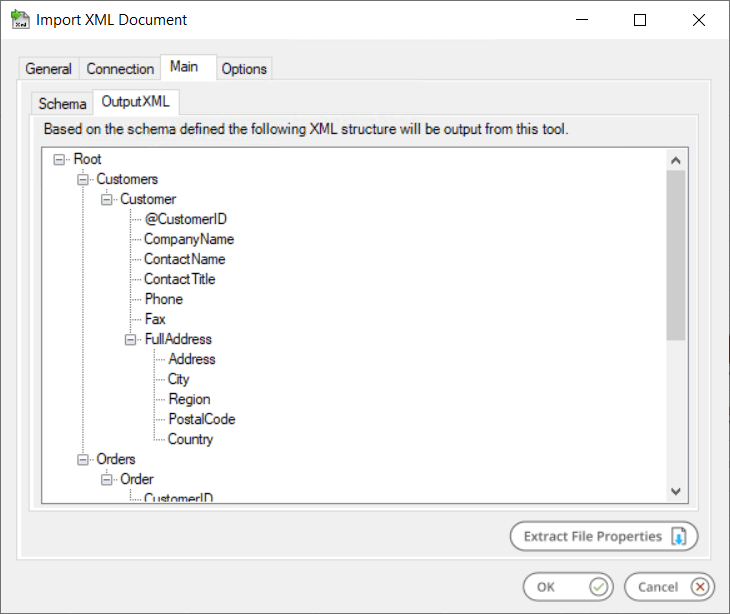
Viewing the Output XML Structure
Once the XML schema has been defined, you can view the expected XML structure in the OutputXML tab:
Extracting File Properties
If required, you can specify which of the imported XML document’s file properties are made available in the Task Browser at run-time:
| Name | Date created |
| Size | Date accessed (Not applicable for SharePoint Online or OneDrive) |
| Item type | Attributes |
| Date modified |
Click Extract File Properties.
About the Options Tab
The Options tab allows you to define how errors in this step are handled at task runtime.
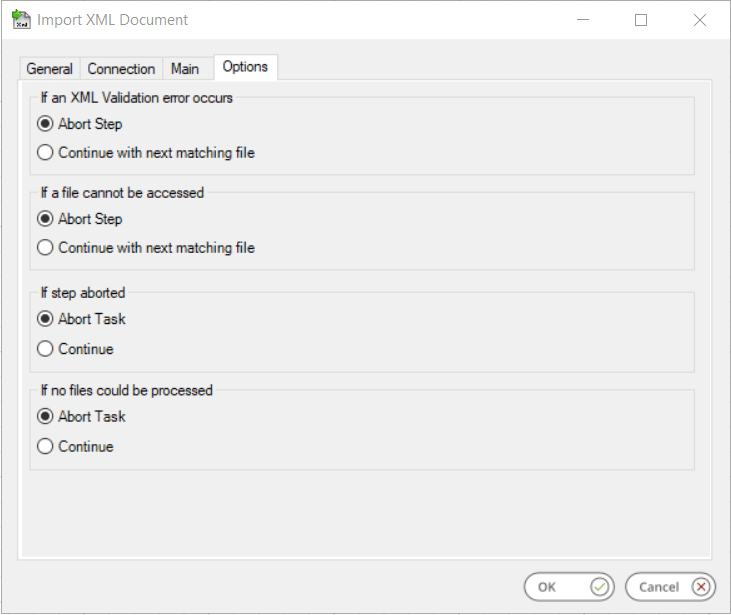
If an XML validation error occurs when processing the current XML document, you can choose to either Abort Step regardless of whether there are unprocessed files remaining or Continue with the next matching file. If there are no more matching files, the step is completed.
If a file cannot be accessed, you can choose to either Abort Step regardless of whether there are unprocessed files remaining or Continue with the next matching file. If there are no more matching files, the step is completed.
If either of the above options are set to Abort Step, you can choose what happens to the whole task itself with the next option set:
- If the step is aborted, you can choose to Continue processing onto the next step in the task, or terminate the whole task immediately (Abort Task).
If the Import XML Document step has attempted to process all available XML documents and has failed (Continue with next matching file has been selected from the previous option sets), you can choose what happens to the whole task itself with the next option set:
- If no files could be processed, you can choose to Continue processing onto the next step in the task, or terminate the whole task immediately (Abort Task).