Introduction
The Format as HTML Pro tool is used to create a task step that produces single or multiple HTML documents. You can choose to create the HTML template from scratch or import a pre-existing template. Recordsets and other task step properties can also be used to populate the HTML template to produce dynamic content documents. These documents can then be consumed and then delivered by Output or Execute task steps.
Features
- HTML 4.0 onwards supported
- Create or use existing HTML templates
- Support for use of complex templates
- Create single or multiple documents as required
- Merge data from other task steps
- Support for multiple recordsets
- Support for input recordset customisation in the tool rather than in the consumed step
- Support for multiple tables, including having tables embedded in existing tables
- Support for image resource handling relative to the task step
- Freedom to display in other methods other than tables, for example, lists, free-form, and so on
Format as HTML Pro Tool Video Overview

White Paper - Format as HTML Pro
Technical Summary
Working with other Tools
The Format as HTML Pro tool can directly interact with the following tools:
Consuming From Other Tools
The Format as HTML Pro tool can consume objects outputted by the following tools:
| Icon | Tool Name | Tool Category |
|---|---|---|
| Call Stored Procedure (OLEDB) | Input, Data Connectors, Output, and Execute | |
| Database Query (ODBC) | Input and Data Connectors | |
| Database Query (OLEDB) | Input and Data Connectors | |
| Import Flat File | Input | |
| Convert XML to Recordset | Format | |
| Filter Data | General |
Objects Consumed
The following objects, outputted by the above tools, can be directly consumed by the Format as HTML Pro tool:
- Recordset — Tabular data from any BPA Platform tool capable of exposing such data (see above)
Exposing to Other Tools
Objects exposed by the Format as HTML tool can be directly consumed by the following tools:
| Icon | Tool Name | Tool Category |
|---|---|---|
| Save File | Output | |
| Send Email (SMTP) | Output | |
| Transfer File (FTP) | Output | |
| Call COM Object | Execute | |
| Run External Program | Execute | |
| Run VBScript | Execute |
Objects Exposed
The following objects, exposed by the Format as HTML Pro tool, can be directly consumed by the above tools:
- Documents (HTML) — Standalone HTML pages
- RecordSource — If an Input Recordset has been selected, this contains the columns included in the recordset
- Step Properties — Standard step properties are available allowing you to use statistical data of the tool
Global Configuration
The Format as HTML Pro tool does not require any global configuration before being used in a task.
Step Configuration
To add a new Format as HTML Pro step to an existing task:
- Click and drag the Format as HTML Pro icon from the Task Browser to the task Design area.
- From the task’s Design tab, right-click on empty space and select New > Format > Format as HTML Pro.
– OR –
For a detailed description of how to create new tasks, refer to the product help.
About the General Tab
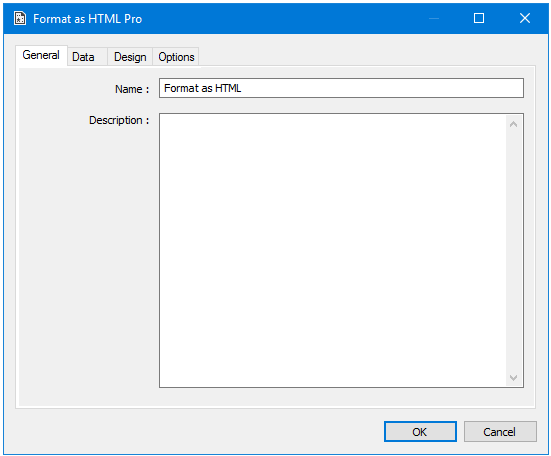
The General tab is used to Name and describe (Description) this task step.
About the Data Tab
You use the Data tab to specify and manipulate the data sources included in your HTML document.
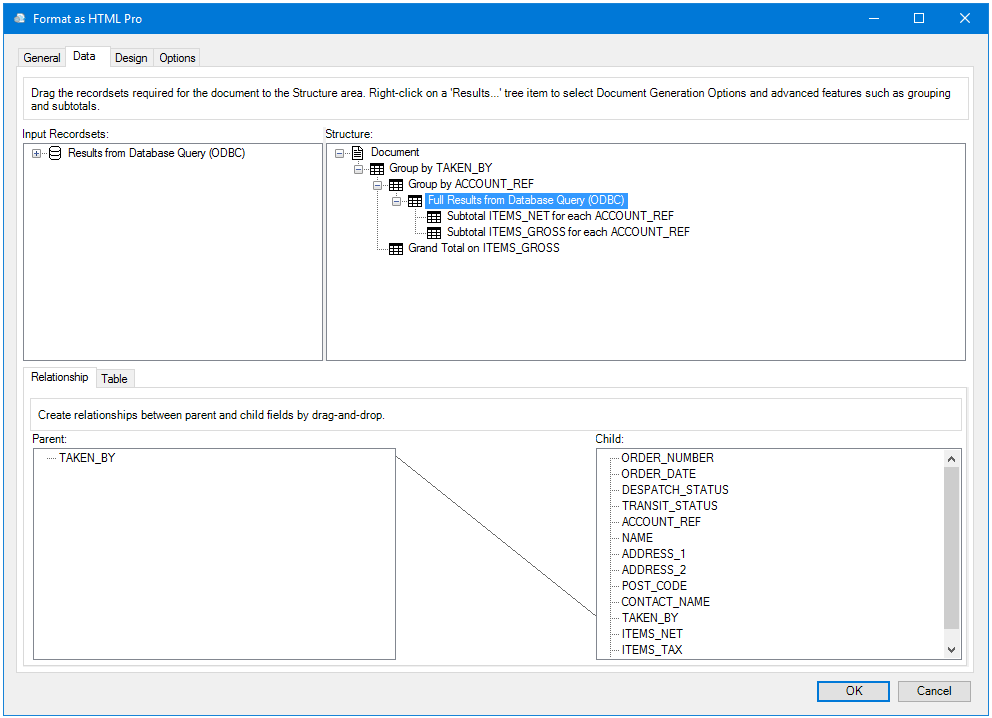
Available recordsets from previous task steps are shown in the Input Recordsets pane. Drag the relevant recordsets whose data you want in the HTML document, to the Structure pane in the required data structure order.
Document Generation Options
Note that the Document Generation Options pane is only available for the parent-level results set under Document. Use this pane to determine whether a single document is created at task run-time or multiple documents, based on the following:
From the Document Generation Options pane, you specify when a new document is generated:
- Single Document — Generate a new document each time the Format as HTML Pro task step is run.
- New Document when Column changes — Generate a new document each time the value in a specified column changes. Select the relevant column.TIP: You can nominate multiple columns to generate new documents from. If so, the nominated columns are read as an OR statement rather than an AND. You do not need to restructure your recordset data to achieve this; each record is read and processed in turn.
- One Document for each row — Generate a new document for every record in the input recordset.TIP: If required, you do not have to include nominated columns in your outputted HTML document.
Grouping Your Data
This feature acts in the same manner as the GROUP BY condition in SQL. If your input recordset data is not grouped, you are getting generating a New Document when Columns change, or wanting sub-totals generated per group, you should create a group node. Group nodes control which records are returned; rather than saying “here is my data, group it” (recordset node as the parent to the group node), group nodes work in the opposite manner by saying “group the following data by these columns” (group node as the parent to the recordset).
To add a group node, you must convert the recordset node added previously to the group template (right-click the node > Templates > Convert to Group). Then select the relevant Column and Key.
Creating Hierarchical Groupings
To create a hierarchical grouping, you add the second group as child nodes to the initial group node created above:
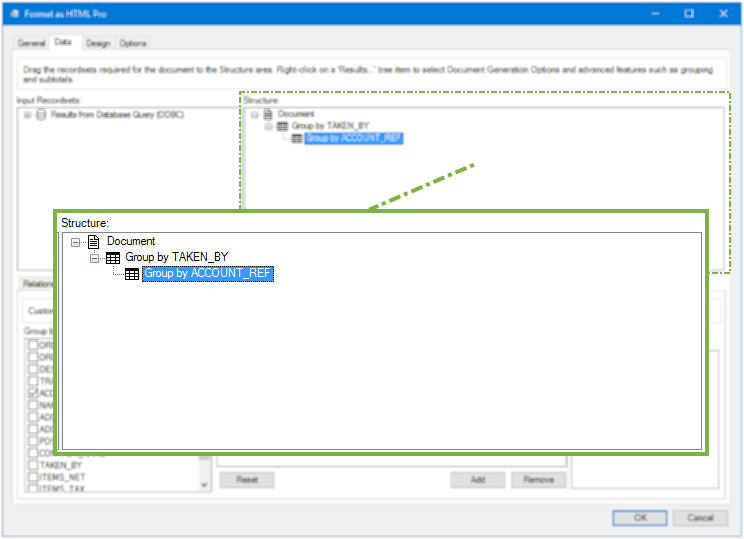
Creating Sub Totals
ou can create sub-totals for any required columns on either the group node (to generate a sub-total per group) or the recordset node (to generate a sub-total per recordset not per record). To add sub-totals to the output, right-click on the required node and select Templates > Add Subtotals.
Creating Grand Totals
Grand totals are sums of all values, typically currency, in a column in the recordset. They are added as child nodes to either the group node (to generate a grand -total per group) or the recordset node (to generate a total per recordset not per record).
You create grand totals in a similar way to creating groups.
Automatically Creating Groups and Sub and Grand Totals
If consuming a single input recordset, you can create HTML tables in a similar vein to those available in the Format as HTML tool, with the sub and grand totals as part of the main table rather than embedded as sub-tables. To do this, select the Convert to Flat Table template for the input recordset.
Adjusting the Recordset Structure
By default, all columns in the consumed recordset(s) are included in the HTML output without any further data manipulation. You can tailor what is included in your HTML document to suit.
If required, you can exclude recordset columns from your HTML document. Highlight the relevant column in the Columns pane and click Remove.

You can adjust recordset columns to suit — by changing the column name to a user-friendly name in the template, or by changing the aggregation type. Highlight the column and adjust the Column Properties to suit.
Use the Reset button to revert columns and properties to their default state. The Refresh option will update the available columns and preserve any property customisations.
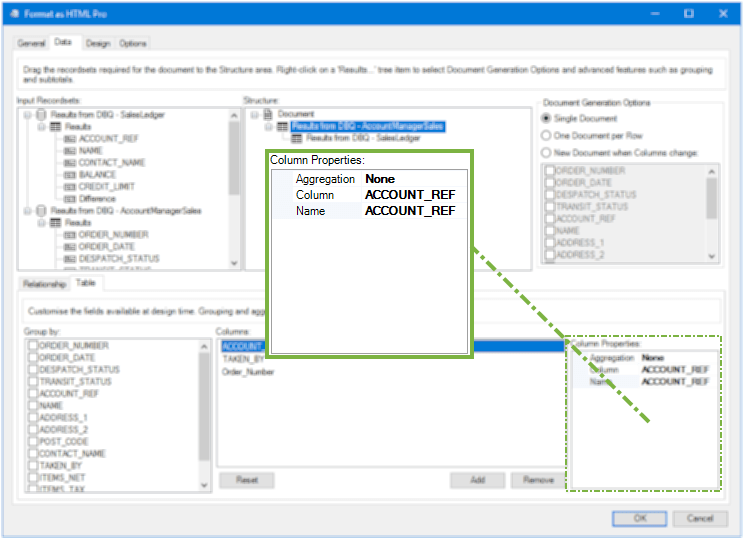
By default, sub and grand total columns use the sum aggregation type. If required, you can create aggregations for other columns in the recordsets.
Specifying the Recordset Relationships
If your Structure has parent-child relationships, you must create the relationships between them to ensure the correct data is displayed in the document. You do this in the Relationship tab:
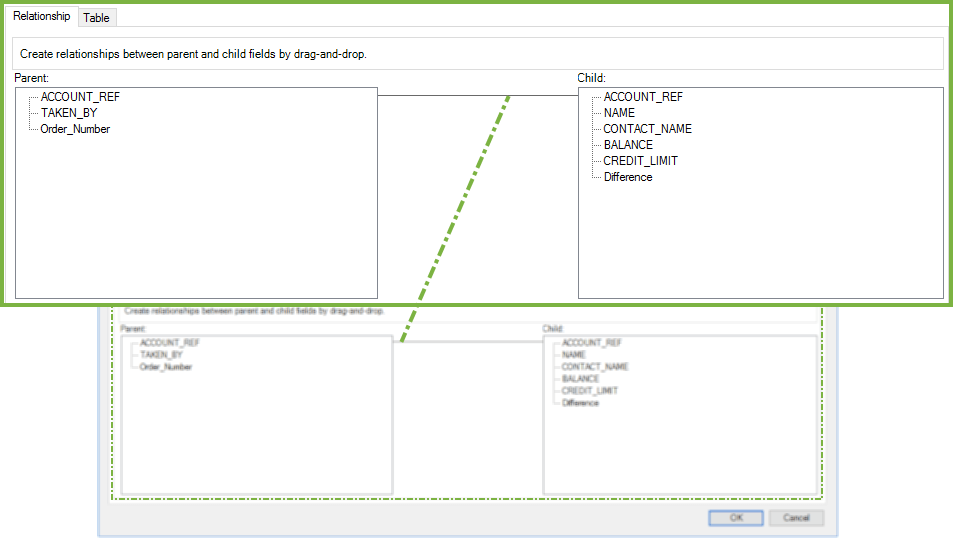
Drag the relevant columns from the Parent pane to their equivalent in the Child pane. Do this for every parent child relationship you have created. Note that this feature is only available when the child node is highlighted in the Structure pane.
About the Design Tab
Create your HTML templates in the Design tab.
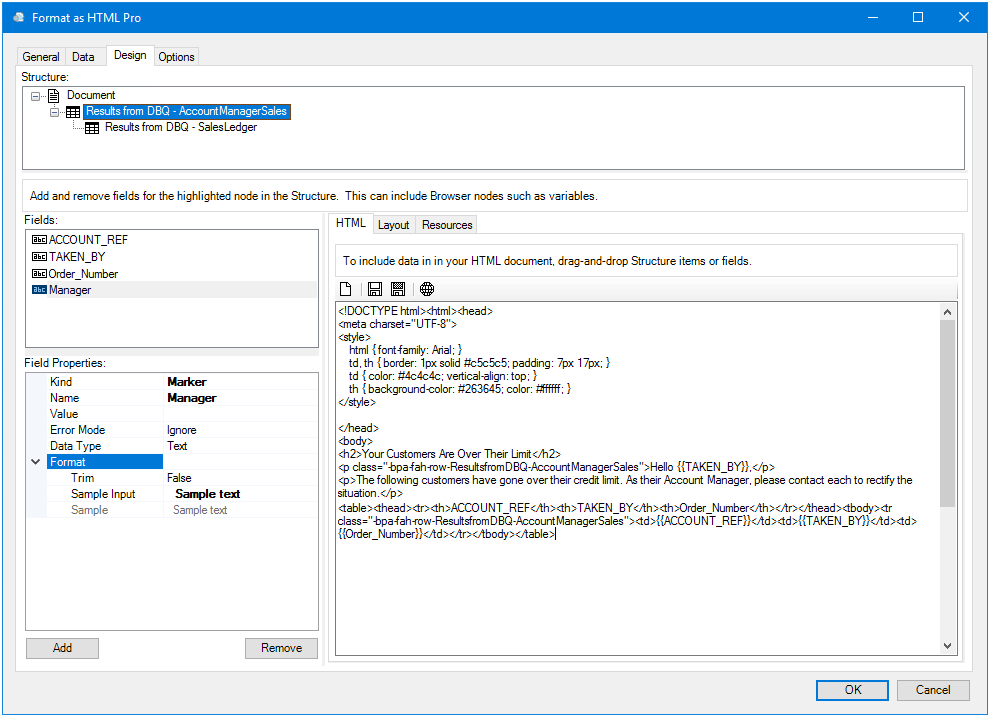
Styling the HTML Template
Basic in-line styles — for font and table styling — are available when you first create the HTML template.
You can either:
- Refer to a central stylesheet (CSS) via a URL
- Embed the CSS into the task step’s local Resources
- Declare more in-line styles — this is recommended if CSS values are passed from an external location to the task step at run-time
Creating a Basic HTML Template
Use the HTML tab to add HTML elements to create the output. To add required BPA Platform data to your template, drag the results sets from Structure to the design area.
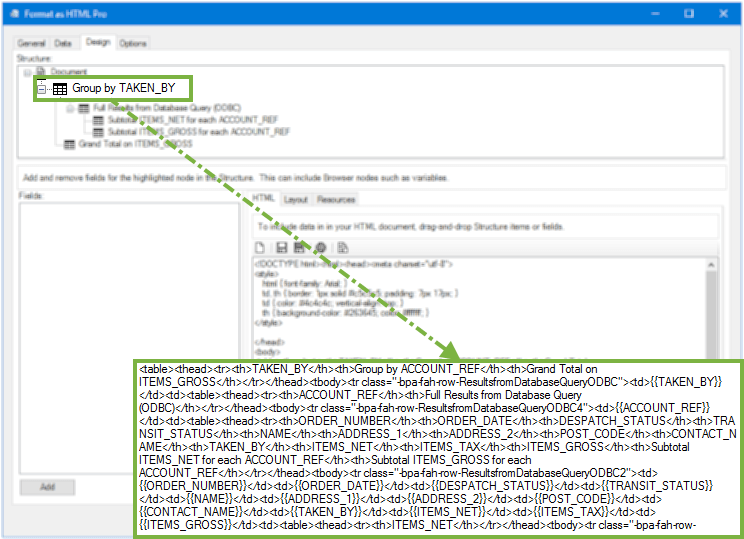
When dragging nodes into the design area, a few templates are available to you:
- Node ID — The internal unique identifier of the recordset node as plain text.
- Table — The recordset data displayed as a table. If this recordset has children, selecting this option won’t include them in the HTML template. All records from the recordset are used in the output template.
- Table with Children — The recordset data, displayed as a table, with all child recordsets included as an embedded table per row. This option is only available when using the parent recordset. The image above had this option selected.
- Flat Table — If you have used the Convert to Flat Table template when building your recordset structure, use this option to output an HTML document in the same format as outputted by the Format as HTML tool.
{{ and }}.Checking the HTML Design
Use the Layout tab to check the design of your HTML template. Note that the editor available in the Layout tab is not designed to create the whole template. Instead, use it to get your template “off the ground” then switch back to the HTML tab to complete it.
Use the Launch button in either the HTML or Layout tabs to open your template, with placeholders, in the default browser for your machine.
A Note About the BPA Platform-Specific HTML Classes
A few things to note about the HTML:
-
class="-bpa-fah-row-[node_id]"— This class is a BPA Platform-specific class. It handles looping through the node_id’s input recordset and outputs each record found on a new line. You can add this class to any valid HTML element (p, span, div, and so on).- Putting
class="-bpa-fah-row-[parent_node_id]"in a<tr>element renders a new row in the table for each record in the input recordset. If this was the<table>element, it generate a new table for every record.TIP: To find the ID for a node, drag it from the Structure pane into some free space in the HTML design area and select Node ID from the menu.
- Putting
class="-bpa-fah-node-[node_id]"— This class is a BPA Platform-specific class. It handles looping through the node_id’s input recordset and outputs each record contiguously.NOTE: Do not apply CSS (styling) to these classes; it is ignored and removed at task run-time.To see examples of usage for each class, refer to the product help and guides.
- Marker fields — Marker fields are those wrapped in
{{ }}. These are placeholders for BPA Platform data; in this scenario, for recordset data. The markers must belong to a parent-bpa-classotherwise a validation error may occur.
Each BPA Platform-specific class is valid until the closing tag in which it resides — for example, if you put a class inside a div, all markers encountered in that div must belong to the declared node ID. Markers from other node IDs placed inside the div will generate an error unless their class is also declared inside the div. In fact, it is perfectly acceptable to declare a BPA Platform class inside the body tag, however, you should only declare the highest level parent node here. If your data structure has more than one parent node at the same level, you shouldn’t declare any BPA Platform classes in the body tag.
Using Format as HTML Pro’s Advanced Features
Importing HTML Templates
If you have created a template in an external HTML editor, you can import it into the Format as HTML Pro tool and add data sources to it — from the HTML tab’s toolbar, click Open.
Adding Additional Fields to the Results Sets
If required, you can add additional fields and markers to your HTML template for other BPA Platform data outside of the recordsets or for static values. Typically, such fields are added to the Document level of the Structure, however, you can add additional fields and markers to any level of the structure.
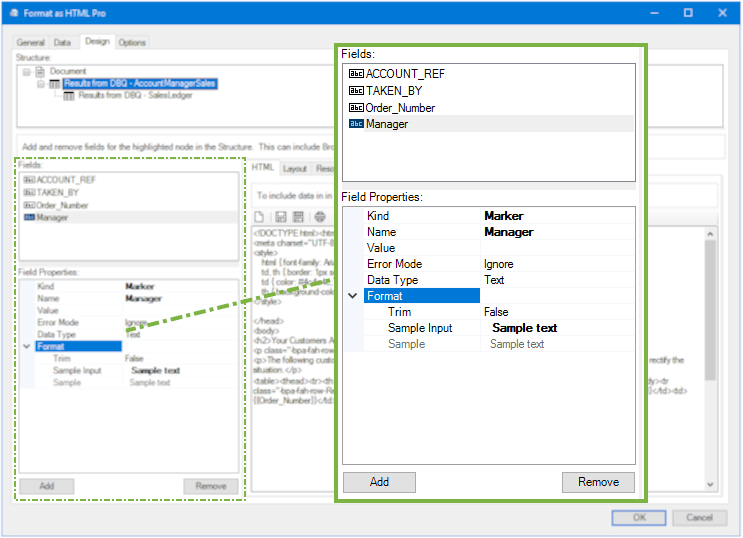
If changing the Culture format, the available list is determined by your operating system. For a detailed description of each culture code, refer to your operating system’s documentation.
The Raw format available with the Text data type determines how HTML elements found in this field are processed:
- True — If data in the field contains HTML tags, enabling this option processes such data as HTML and outputs accordingly. For example,
<b>Name</b>, <em>Description</em>would be outputted as Name, Description. - False — (Default) All data in the field, including any HTML tags, is processed as plain text and outputted as such. For example,
<b>Name</b>, <em>Description</em>would be outputted exactly as you see it here.
Managing Embedded Local Resources
A local resource is that which resides on the local machine and is referenced in the HTML — for example
<img src="C:\Users\Administrator\Desktop\format-as-html-pro.png" />. The Format as HTML Pro tool can extract locally declared resources and cache them in the task step for faster retrieval. This changes the previous URL to <img src="format-as-html-pro.png" />.
The following embedded resources are supported:
- Images (namely
.bmp,.gif,.hdp,.jpeg,.jpg,.jxr,.png,.svg, and.wdp) - CSS files
- JavaScript (JS) files
- XML files
- Other
.htmor.htmlfiles
If caching of local resources is required, do one of the following:
- From the Resources tab, click Add to locate and Open the required resource To use the resource in your HTML template, format your HTML class value as
"filename.file_extension"instead of specifying the whole path. - Add the resource to your HTML, including the full path, as normal (for example,
<img src="C:\Users\Administrator\Desktop\myimage.png" />)
When all resources have been added, click Extract Resources; all resources are added to the Resources tab.
- Relative to the local template, that is,
..\images\myimage.png - Using the full local path, that is,
C:\Users\Administrator\Desktop\myimage.png - Using a network path, that is,
\\mynetwork\images\myimage.png
About the Options Tab
The Options tab allows you to define how errors in this step are handled at task runtime.
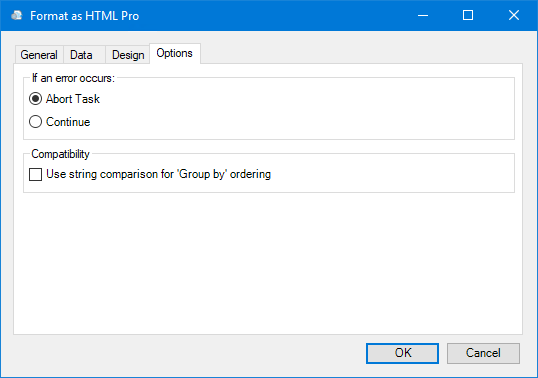
If an error occurs, you can decide whether the step should Continue processing, or terminate the step immediately (Abort Task).
By default, data from grouped nodes are sorted according to their values; if grouping by a numeric field, this results in the following output:
1, 2, 3 … 10, 11, 12 … 20, 21, 22 … 30, 31, 32, and so on.
If string-based sorting is required, enable Use string comparison for ‘Group by’ ordering in the Compatibility panel; numeric fields would then output as:
1, 10, 11 … 2, 20, 21 … 3, 30 31, and so on.