Introduction
Use the File Management tool to carry out a number of automated actions on single or multiple files. Move, copy, rename or delete files either from a local or network file system location or from cloud-based storage providers such as OneDrive, SharePoint Online and Google Drive; or upload and download files using a number of supported File Transfer (FTP) protocols against a nominated FTP Server.
Features
- Copy or move any file type to another location either locally or on a networked file system, or create a connection to a cloud-based file storage provider including OneDrive, SharePoint Online or Google Drive
- Upload or download files to a nominated FTP Server using a number of supported protocols including SFTP (Explicit and Implicit), SFTP, FTP and HTTP/HTTPS
- Automatically create the specified destination folder for the file at run-time
- Ability to overwrite a file
- Optionally set Read Only attributes for files (where supported)
- Limit the moving of a file by setting a maximum file size to process
- Rename a file by using part of the existing file name or use a completely different value
- Optionally add additional properties as a prefix or suffix, or both, including text or a date and time stamp
- Preview the new filename based on the selections made before saving them
- Add suffix characters to the new filename
- Restrict the deletion of a file by the date and time it was last modified
- Limit the copying of a file by setting a maximum file size to process
- Include multiple files for processing through the use of wildcards (
*and?) when selecting the source file(s)
White Paper - File Management
Technical Summary
Working with Other Tools
The File Management tool can directly interact with the following tools:
Consuming from Other Tools
The File Management tool can consume objects directly outputted by the following tools:
| Icon | Tool Name | Tool Category |
|---|---|---|
| Import Flat File | Input | |
| Import XML Document | Input |
File Management Tool – Objects Consumed
The following objects are outputted by the above tools which can be directly consumed by the File Management tool:
- ImportedFileDetails — This object contains the filename and file path of the file previously consumed by the above tools
Exposing to Other Tools
The File Management tool does not expose any objects that can be directly consumed by another tool. However, it does expose the following objects which can be used in a task step sequence:
- FileProcessed — This object exposes the following sub-objects:
- InputFileName — The name of the source file — see General tab
- OutputFileName — The name of the output file if the Rename action has been selected in the Main tab
- InputFilePath — The location of the source file
- OutputFilePath — The new location of the source file if a Move, Copy, or Upload action has been selected
*), the object’s values are overwritten each time the step processed the next file. In such cases, use Memory to compare the file previously processed with the file currently being processed.Runtime Error Handling
Errors that may occur are written to the BPA Platform Event Log for the upload and download options. They include:
- Remote server connection errors at runtime (including account permission errors)
- Read-only errors or other file permission errors
- If the folder that a file is moved to at run-time is zipped
- If the combined total of the selected files sizes for upload or download exceed the amount of remaining space available within the destination folder
Global Configuration
The global configuration for the File Management tool is used to create connections to either an FTP Server or a cloud-based file storage provider, or both.
You open this interface from the resources tree — expand System > Tools > General and double-click File Management in the items list.
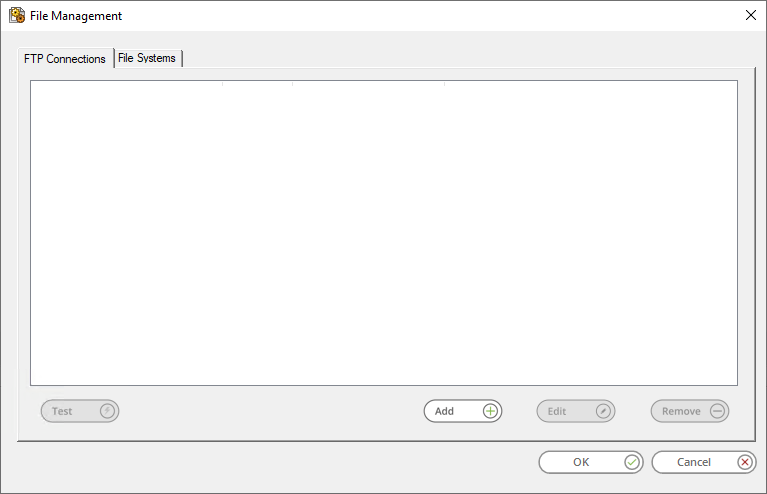
The Global Configuration for the File Management tool comprises two distinct sections:
- FTP connections tab – create and maintain connections to one or more FTP Servers.
- File Systems tab – create and maintain one or more connections to supported cloud-based file storage providers.
- FTP — File Transfer Protocol. The standard network protocol used to transfer files from one host to another. This protocol has a low level of security and does not encrypt the files or user credentials during transfer, therefore not suited for use over a public network where confidential information is involved.
- FTPS — File Transfer Protocol with TLS/SSL. This protocol is an extension of FTP which offers security when transferring files. FTP data is protected using TLS and formerly SSL (now deprecated). It is suited for the handling of confidential information. Two variants are available:
- Explicit — The server is explicitly requested to create a secure channel on port 21 using TLS prior to authentication. This is the most commonly used method.
- Implicit — A connection is made to a dedicated port (usually 990) where the request always uses TLS. Implicit FTPS is generally considered to be deprecated however may be applicable on some environments.
- SFTP — SSH File Transfer Protocol. This protocol is over a connection that has previously been secured using the Secure Shell (SSH) protocol. Secure Shell (SSH) is a software-based approach to network security where an installation of an SSH client and an SSH server are required. SSH creates a secure connection when communication is established between the client and the remote server.
- HTTP or HTTPS — This protocol is used to retrieve files from an FTP Server over HTTP or HTTPS. This would be used when it is not possible to use an FTP protocol, maybe because the file server only permits HTTP or HTTPS connectivity. Alternatively, an FTP client may not be required for a file transfer, in this case a download over HTTP or HTTPS is sufficient.
- FTP — port
21 - FTPS Explicit — port
21 - FTPS Implicit — port
990 - SFTP — port
22 - HTTP — port
80 - HTTPS — port
443 - Click and drag the File Management icon from the Task Browser to the task Design area.
- From the task’s Design tab, right-click on empty space and select New > General > File Management.
- File System – the location of the source file(s) is either a local or network file system, or a supported cloud-based file system provider.
- FTP/HTTP – the location of the source file(s) is an FTP Server.
- File System – the file destination is either a local or network file system, or a supported cloud-based file system provider.
- FTP/HTTP – the file destination is an FTP Server.
- Use input file names as part of the output file name
- Provide a new File Name
- Years
- Months
- Weeks
- Days (default)
- Hours
- Minutes
- Override global path — By default, the File Management tool will upload files to the Server Directory specified in the selected connection’s global configuration. If a different destination folder is required, select Override global path to allow the task step to upload files to that alternative location at runtime. Enter the new path in the now enabled Directory field.
- Create destination folder if not found — This option only comes into affect at task run-time. Note that if the destination folder is not found and not created, the step will error.
- Overwrite file if it already exists — This option only comes into affect at task run-time. Note that if a matching file is found during the upload and this parameter is not enabled, the step will error.
- Delete source file on completion — Enable this parameter to delete the original source file after a successful upload.
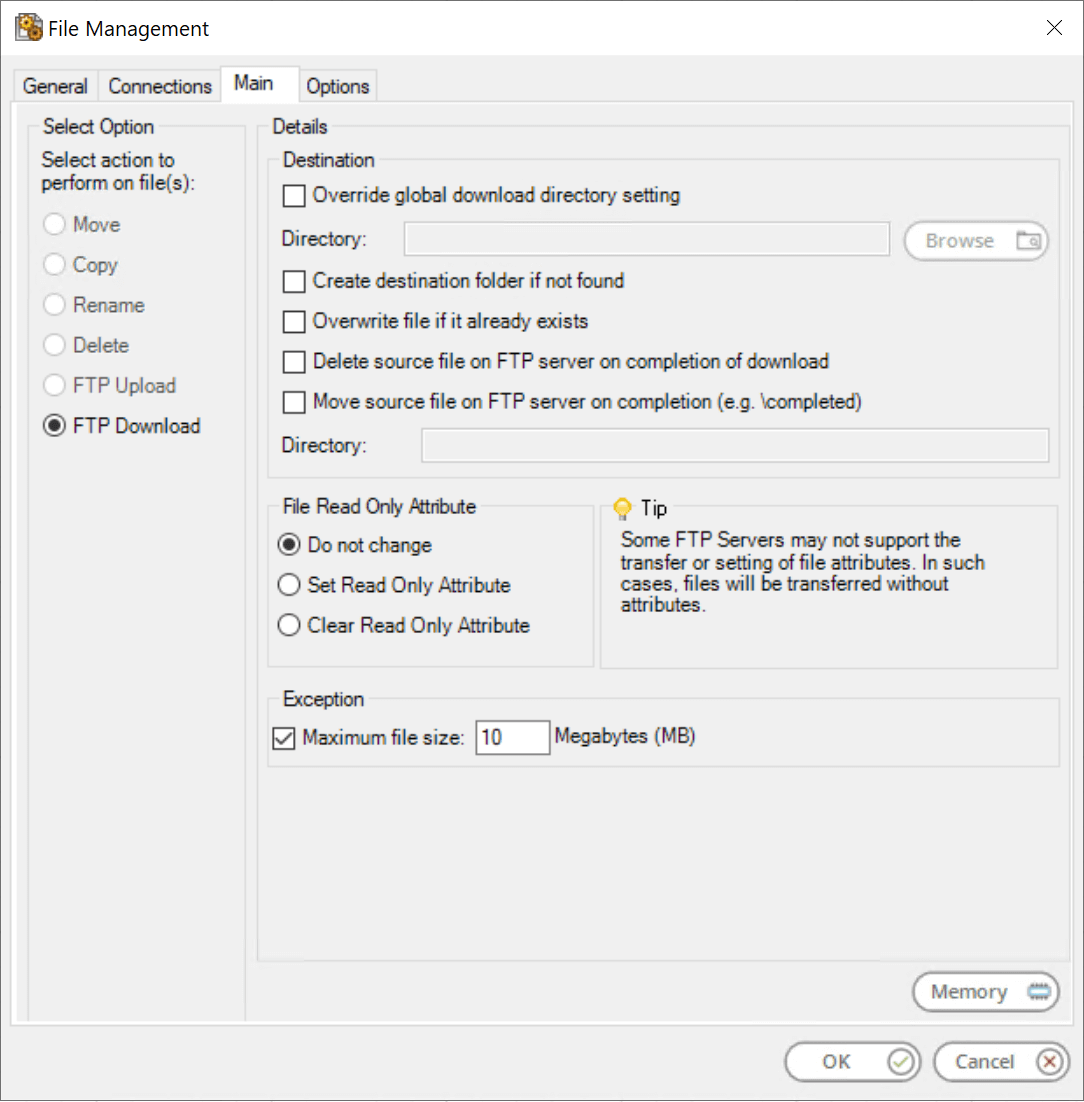
- Overwrite global download directory setting — By default, the FTP/HTTP connection will download files to the Download Directory specified in the File Management connection’s global configuration. If a different destination folder is required, select the Override global download directory setting option to enable the task step to download files to a different directory. Enter the new folder location in the Directory field or use Browse to the select the location. Note that the available file structure is dependent on, and must match that of the destination File System selected in the Connection tab.
- Create destination folder if not found — This option only comes into affect at task run-time. Note that if the destination folder is not found and not created, the step will error.
- Overwrite file if it already exists — This option only comes into affect at task run-time. Note that if a matching file is found during the download and this parameter is not enabled, the step will error.
- Delete source file on completion — Enable this parameter to delete the original source file after a successful download.
- Move source file on completion — If required, you can move the source file to another directory on the FTP or HTTP server.
- Directory — Specify the new folder path. Drag-and-drop recordset columns, variables, and step properties from the Task Browser to create a dynamic folder path. You must ensure the user used to connect to the FTP or HTTP server has the correct access permissions for the new folder.
These connection sets are treated as separate connection configurations within the global configuration and the tool step configuration.
Creating FTP Connections
If you need to access files over an FTP (File Transfer Protocol), FTPS (File Transfer Protocol with TLS/SSL), SFTP (SSH File Transfer Protocol), or HTTPS/HTTP connection you manage these within the FTP Connections tab.
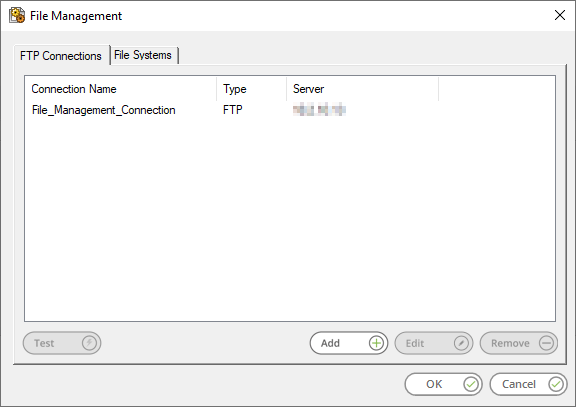
Click Add to create a new connection to a FTP server.
Use Edit and Remove to manage your existing connections.
Adding Connection Properties
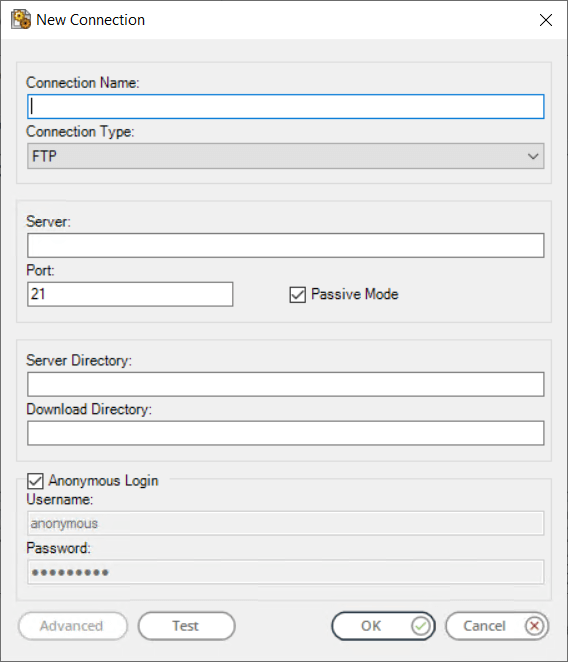
The New Connection interface of the File Management tool is used to create connections to a nominated FTP Server.
Choosing the Connection Type
Enter a unique name for this connection.
Choose a Connection Type:
SFTP is an extension of SSH which adds file transfer capability. It uses the connection to transfer files securely between the two locations. Your files and login credentials are encrypted.
Adding the FTP Server Details
Enter the Server address to connect to. You can use the hostname, IP address, or a valid URL.
By default, the following TCP ports are used to establish the connection to the FTP server:
If the TCP port is use already on your network, adjust this number as required.
Passive mode in FTP is where the FTP connection is initiated from the client side rather than the server. Enable Passive Mode if required by your server.
Server Directory is where the files are downloaded from or uploaded to. Download Directory, on the other hand, is a location on the BPA Platform machine where files are downloaded to.
Download Directory is the location on the BPA Platform machine where files are downloaded to.
Provide the required credentials — Enable Anonymous Login if allowed by the FTP server, else clear the selection for this box and enter the required Username and Password.
At this point, you can click Test to ensure the connection is successful.
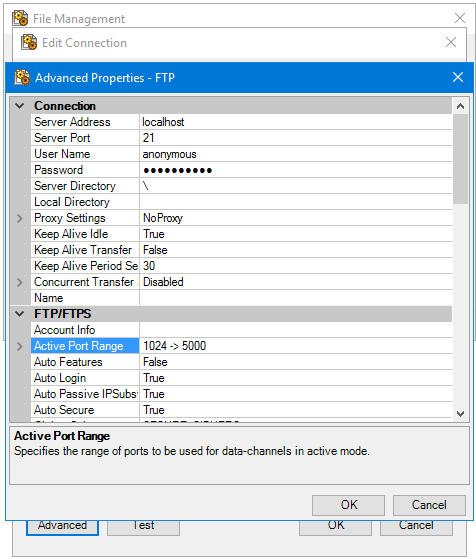
Configuring Advanced FTP Properties
Click Advanced to add advanced configuration, specific to the Connection Type specified previously:
Creating File Systems Connections
The File Systems tab enables creation of connections to cloud-based storage providers, such as Google Drive, OneDrive, or SharePoint Online.
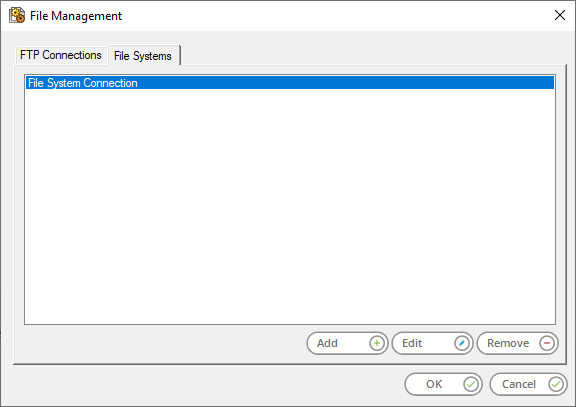
On the File Systems tab, click Add to create a new connection.
Use Edit and Remove to manage your existing File System connections.
About the General Node
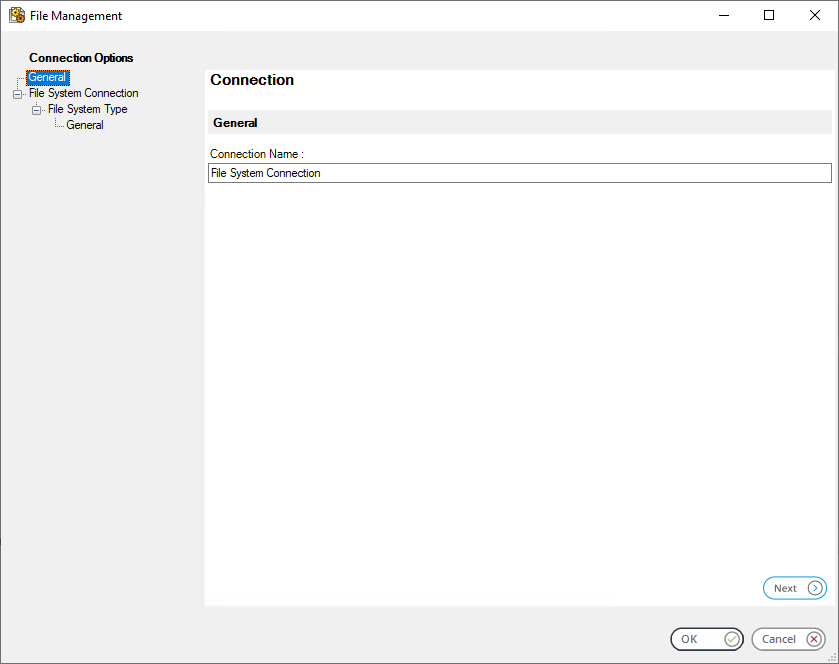
Enter a unique Connection Name for the File Management connection. If adding connections for different types of file system provider, it is recommended you add such details to the connection name to enable you to identify each connection.
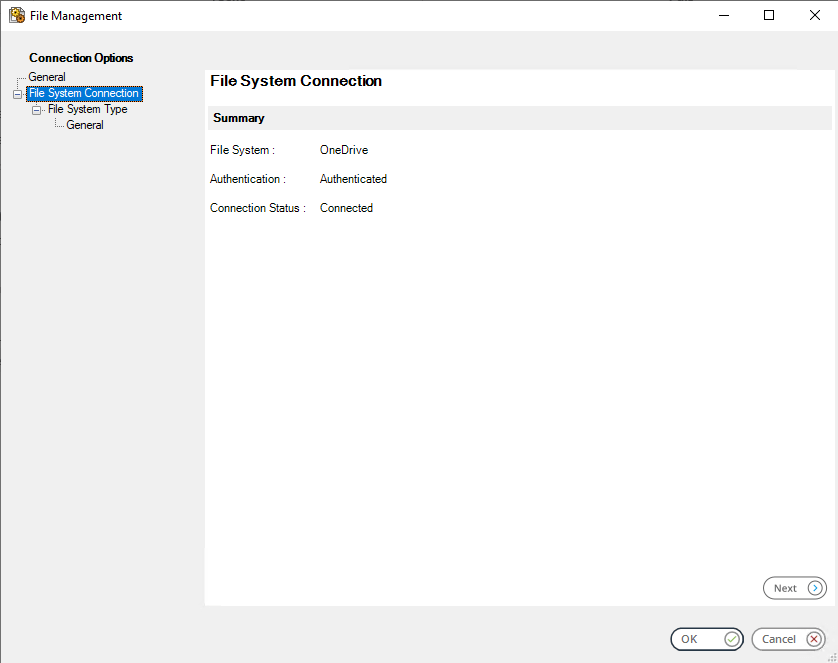
About the File System Connection Node
The File System Connection node, selectable in the Connection Options tree, provides a summary of the connection settings which have been defined in the subsequent File System Type and General node pages. Where no configuration has taken place, the default values for each field will appear as Unknown.
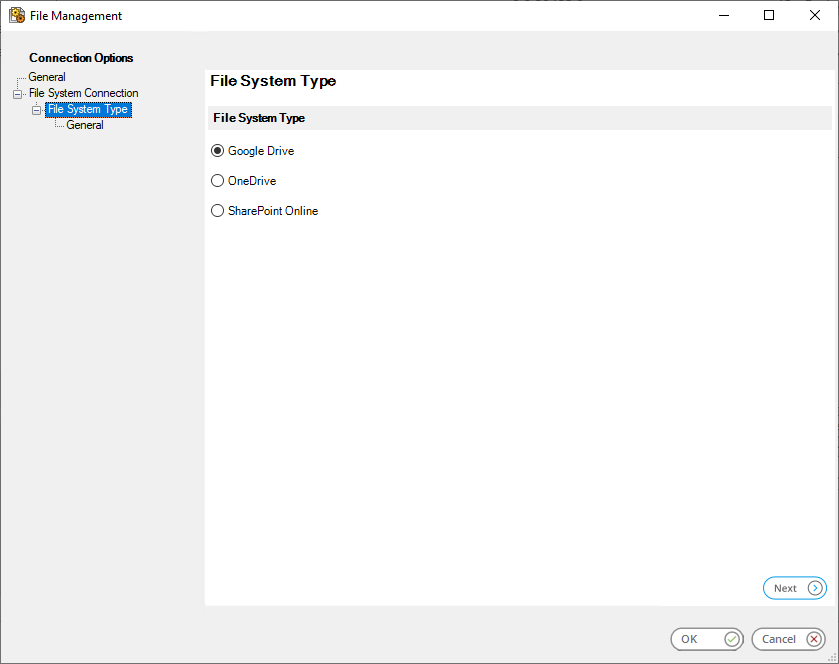
About the File System Type Node
The required File System Type can be selected from the list of supported external file storage providers:
About the File System Type > General node
Following the selection of an external file storage provider type the General node will be enabled.
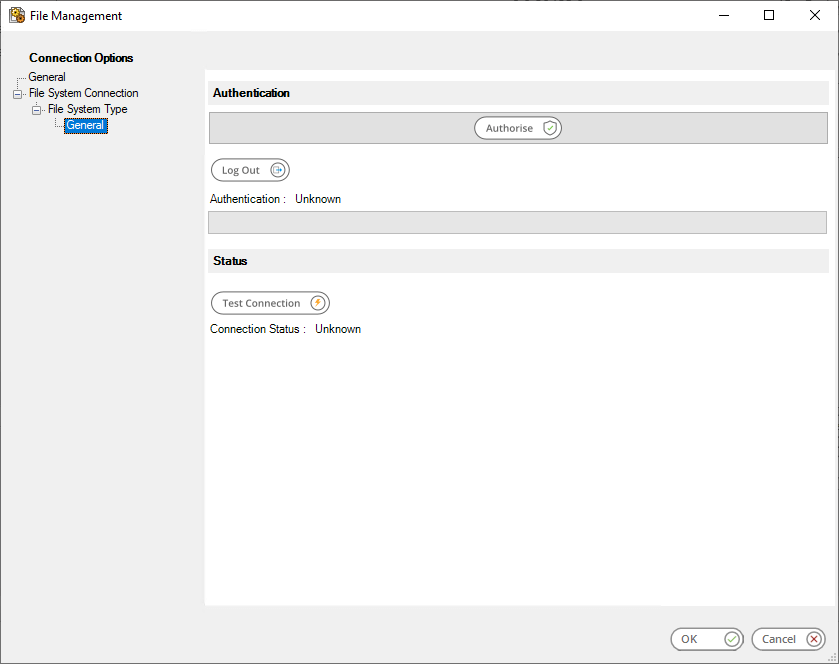
Click Authorise to open the selected storage provider’s login panel. This dialog is managed by the storage provider and displays the fields required to complete modern or multi-factor authentication to your account with them.
Once initial authentication is established, the Test Connection button can be used to confirm the connection. The File Management tool will automatically manage and update the tokens needed to keep the connection live using our standard Token Manager.
The Log Out button can optionally be used to disconnect an established connection. The authorisation process must be repeated if reconnection is subsequently required.
Step Configuration
To add a new File Management step to an existing task:
– OR –
For a detailed description of how to create new tasks, refer to the product help.
About the General Tab
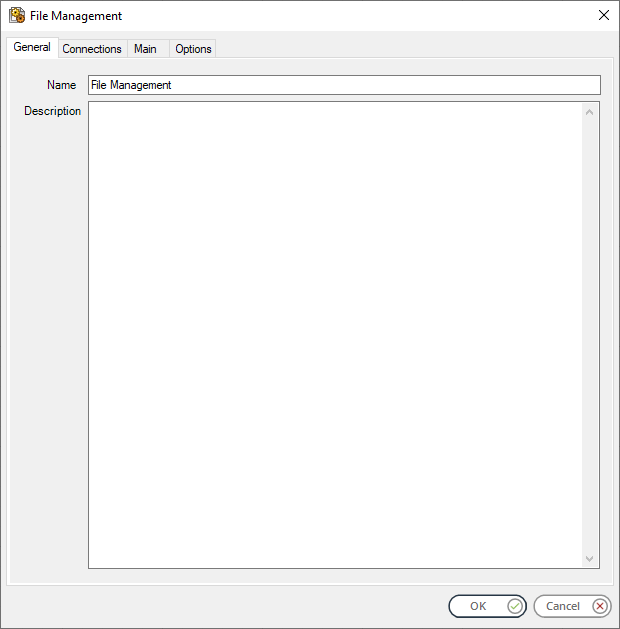
The General tab is used to Name and describe (Description) this task step.
Enter a unique task step Name.
The Description entry, although optional, can be used to store information relating to the File Management task step.
About the Connections Tab
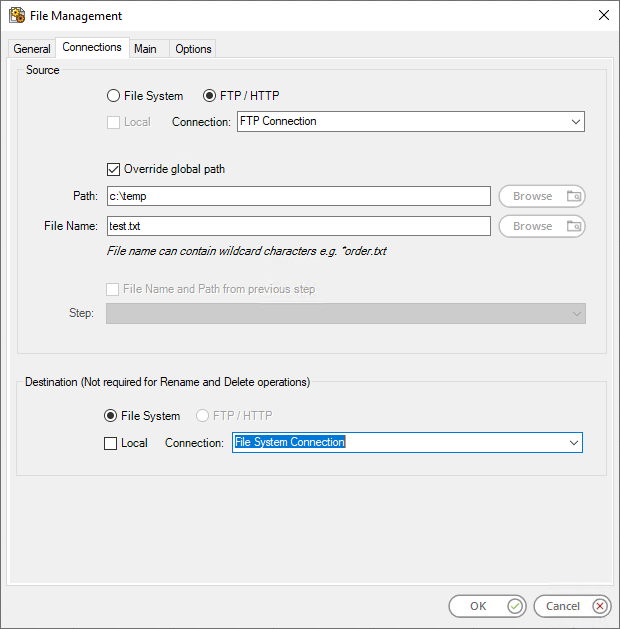
The Connections tab is used to establish a connection to the File Management Source and Destination locations. The setup of this tab depends on the type of activity to be undertaken by the File Management step at runtime. Not all configurations require the Destination location to be defined.
Source
The Source section defines the location and name of any incoming files which are to be processed by the File Management tool at runtime. Only one Source location type can selected per task step. If multiple files from differing sources are required, a separate tool step must be configured for each one.
Select the Source connection type:
File System Connections
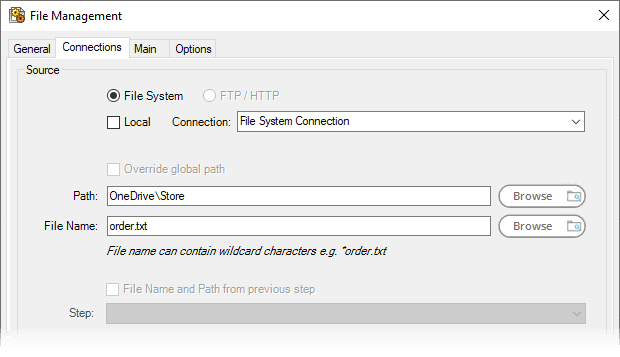
Select the File System source option.
By default the File Management tool will use the local file system for the location of the source file path.
If connections to other file storage locations are available, then the step can be configured to access one of those locations. To do this, clear the Local check-box to enable the Connection drop-down and select from the connection settings previously set-up in the Global Configuration.
Use a BPA Platform variable or formula to create a dynamic connection, where the connection used is determined by runtime circumstances. At runtime, the contents of the variable must match the name of one of the global connections — this is case-sensitive.
Enter the required Path location or use the Browse button and select the required source path.
Enter the source File Name or use the Browse button to select the required file to manage. Wildcards (* and ?) are supported to allow you to manage multiple files from the source location.
The File Name and Path from previous step option is available for selection if the source File Name and Path can be retrieved using input from a previous task step (see Consuming from Other Tools).
FTP/HTTP Connections
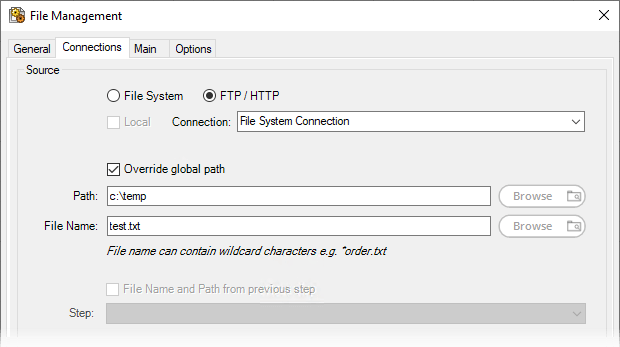
Select the FTP/HTTP source option.
If FTP/HTTP is selected in the Destination section, then this option will be disabled in the Source settings.
Use the Connection drop-down and select from the connection settings previously set-up in the Global Configuration.
By default, the FTP/HTTP connection will download files from the Server Directory specified in the File Management connection’s global configuration (see Adding the FTP Server Details). If a different source folder is required, select the Override global path option to enable the task step to download files from a different directory.
If Override global path has been selected, enter the Path location or use the Browse button and select the required source path.
Enter the source File Name or use the Browse button to select the required file to manage. Wildcards (* and ?) are
supported to allow you to manage multiple files from the source location.
The File Name and Path from previous step option is available for selection if the source File Name and Path can be retrieved using input from a previous task step (see Consuming from Other Tools).
Destination
The Destination section defines the resultant location and name of any files which are to be processed by the File Management tool at runtime. Only one Destination location type can selected per task step. If multiple destination types for files are required, a separate tool step must be configured for each one.
Select the Destination connection type:
File System

Select the File System destination option.
By default the File Management tool will use the local file system for the destination file location.
If connections to other file storage locations are available, then the step can be configured to access those locations.
To do this, clear the Local check-box to enable the Connection drop-down and select from the connection settings previously set-up in the Global Configuration.
FTP / HTTP

Select the FTP/HTTP destination option.
If FTP/HTTP is selected in the Source section, then this option will be disabled in the Destination settings.
Use the Connection drop-down and select from the connection settings previously set-up in the Global Configuration.
About the Main Tab
Use the Main tab to manage the actions to be performed upon the source files. The availability of one or more options will depend on the configuration of the Source and Destination settings in the step’s Connections tab.
Each option displays the associated fields applicable to that action.
The following file actions are supported:
Moving Files
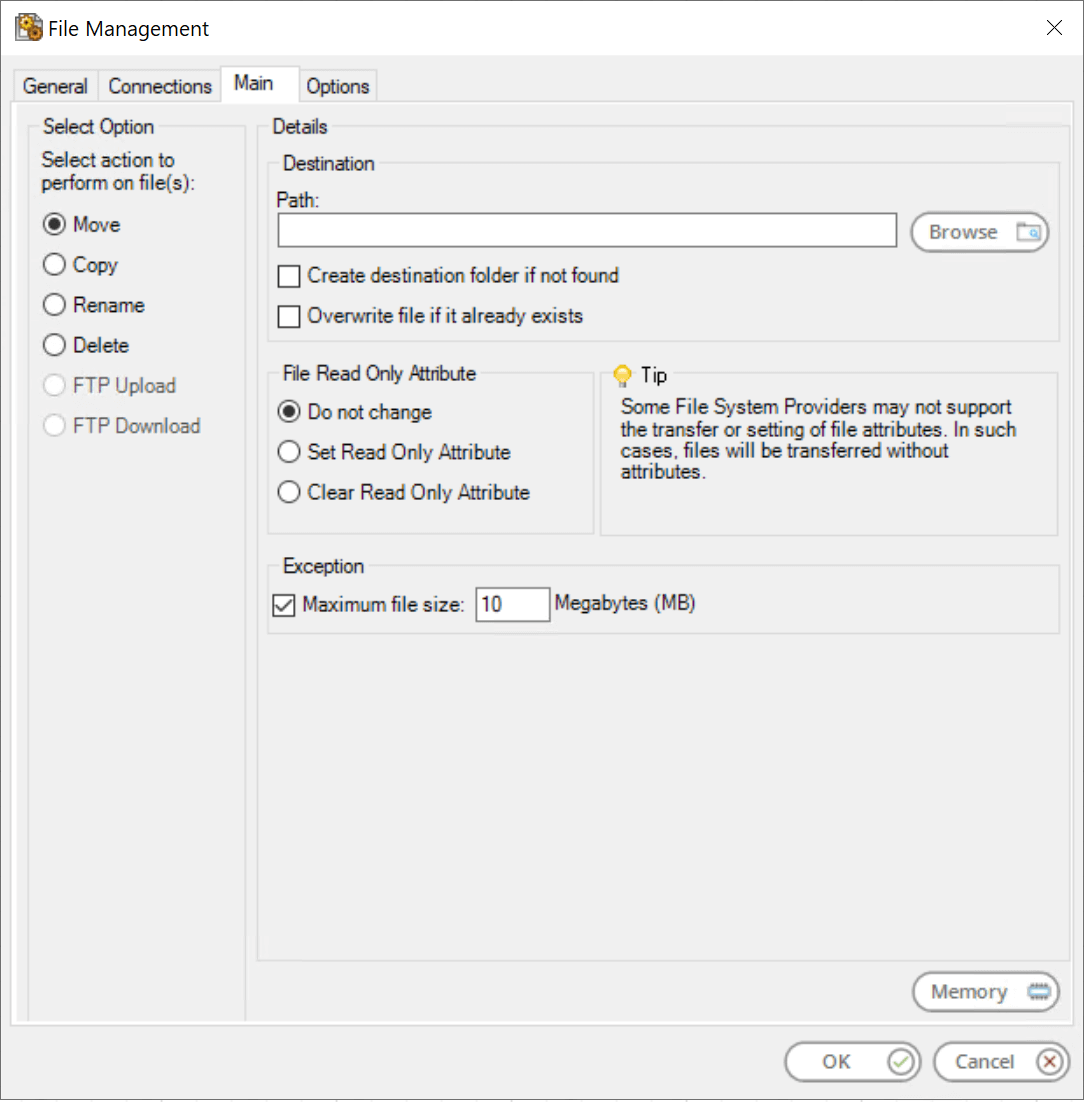
Specify the new Destination to move the files to. Create destination folder if not found and Overwrite file if it already exists come into affect at task run-time.
If required, use the settings in the File Read Only Attribute pane to adjust the file’s properties. Note that not all file systems support the transfer or setting of file attributes. In such cases, the files will be moved with their current properties.
You must specify the Maximum file size (in MB) that the File Management tool can move. Any matching files larger than the specified size are not moved and remain in their source location. This field is mandatory and defaults to 10 MB.
Optionally, use Memory to memorise some or all of the step output for use in other task steps. This is particularly useful when the File Management step is called multiple times — use Memory to compare the document previously processed to the new document currently being processed to avoid duplicates.
Copying Files
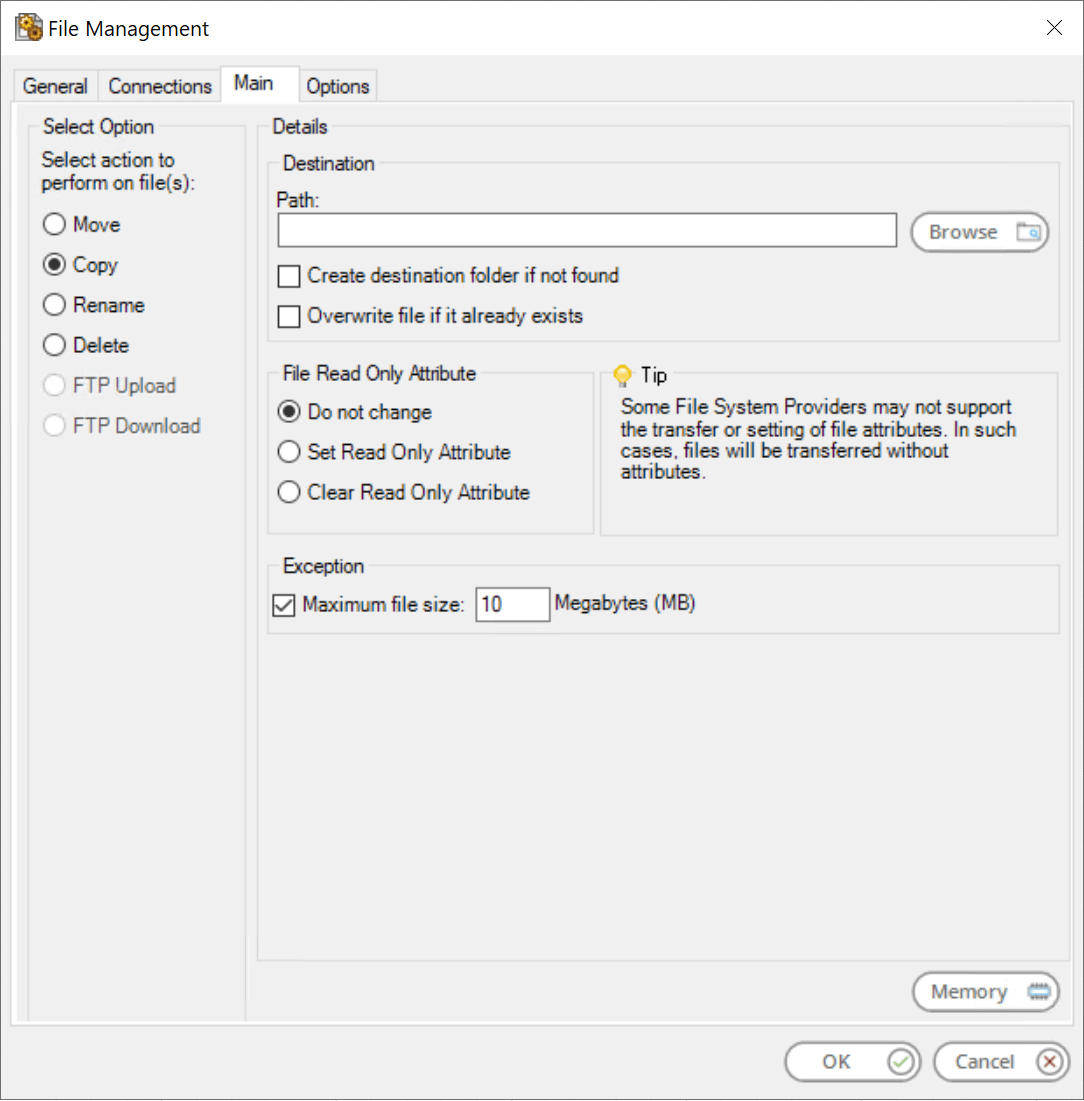
Specify the new Destination to copy the files to. Create destination folder if not found and Overwrite file if it already exists come into effect at task run-time.
If required, use the settings in the File Read Only Attribute pane to adjust the file’s properties. Note that not all file systems support the transfer or setting of file attributes. In such cases, the files will be moved with their current properties.
You must specify the Maximum file size (in MB) that the File Management tool can copy. Any matching files larger than the specified size are not copied. This field is mandatory and defaults to 10 MB.
Optionally, use Memory to memorise some or all of the step output for use in other task steps. This is particularly useful when the File Management step is called multiple times — use Memory to compare the document previously processed to the new document currently being processed to avoid duplicates.
Renaming Files
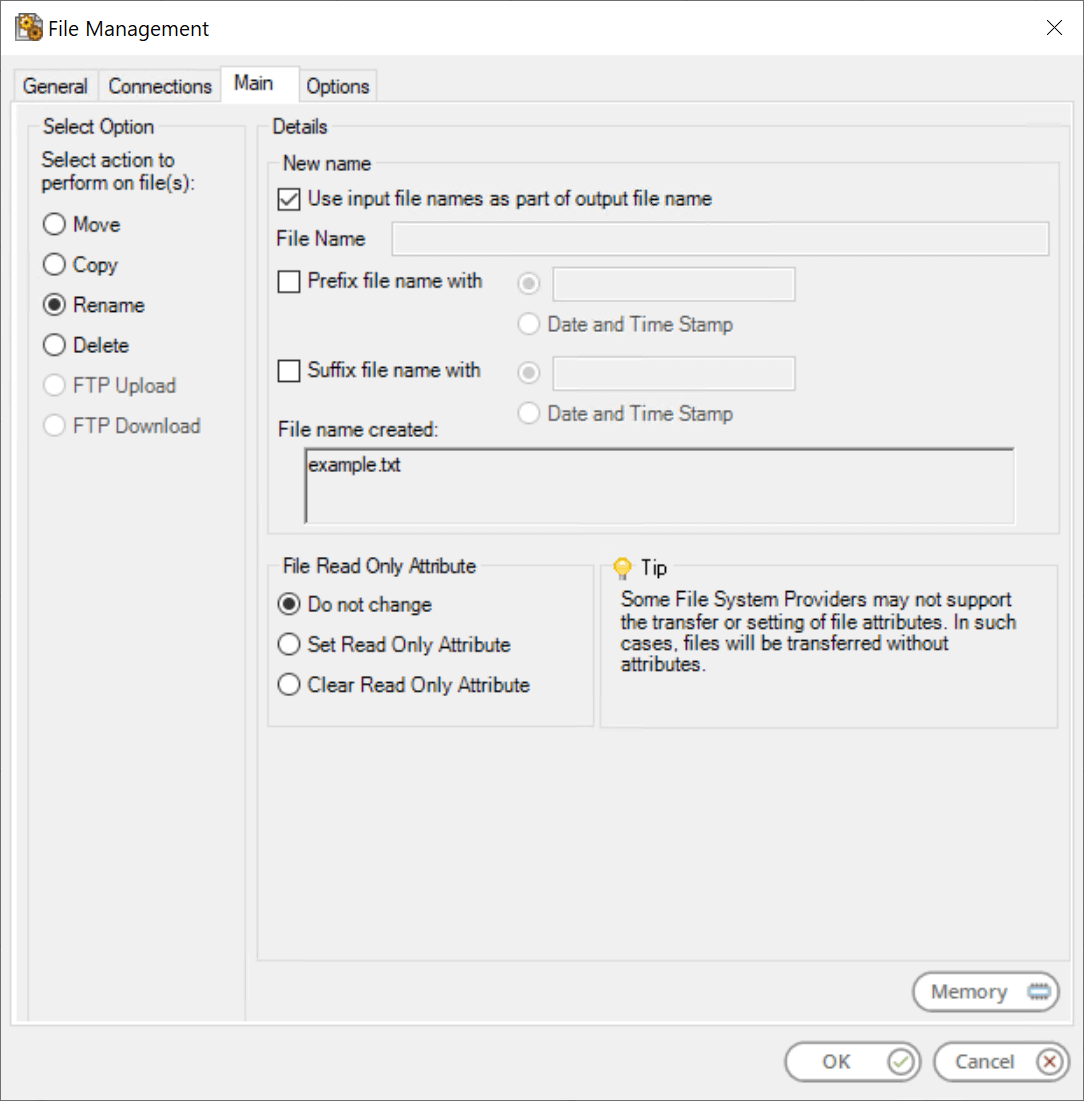
When renaming files, you can choose to:
The File Name, whether new or reused, forms part of the new file name. You can optionally add a string or a Date and Time Stamp to the beginning of the filename (Prefix file name with) or to the end (Suffix file name with), or do both. At the time of writing, the date and time stamp is formatted as YYYYMMDDhhmmss and cannot be changed.
File name created displays an example of the new file name format to be created at task runtime.
If required, use the settings in the File Read Only Attribute pane to adjust the renamed file’s properties. Note that not all file systems support the transfer or setting of file attributes. In such cases, the files will be renamed with their current properties.
Optionally, use Memory to memorise some or all of the step output for use in other task steps. This is particularly useful when the File Management step is called multiple times — use Memory to compare the document previously processed to the new document currently being processed to avoid duplicates.
Deleting Files
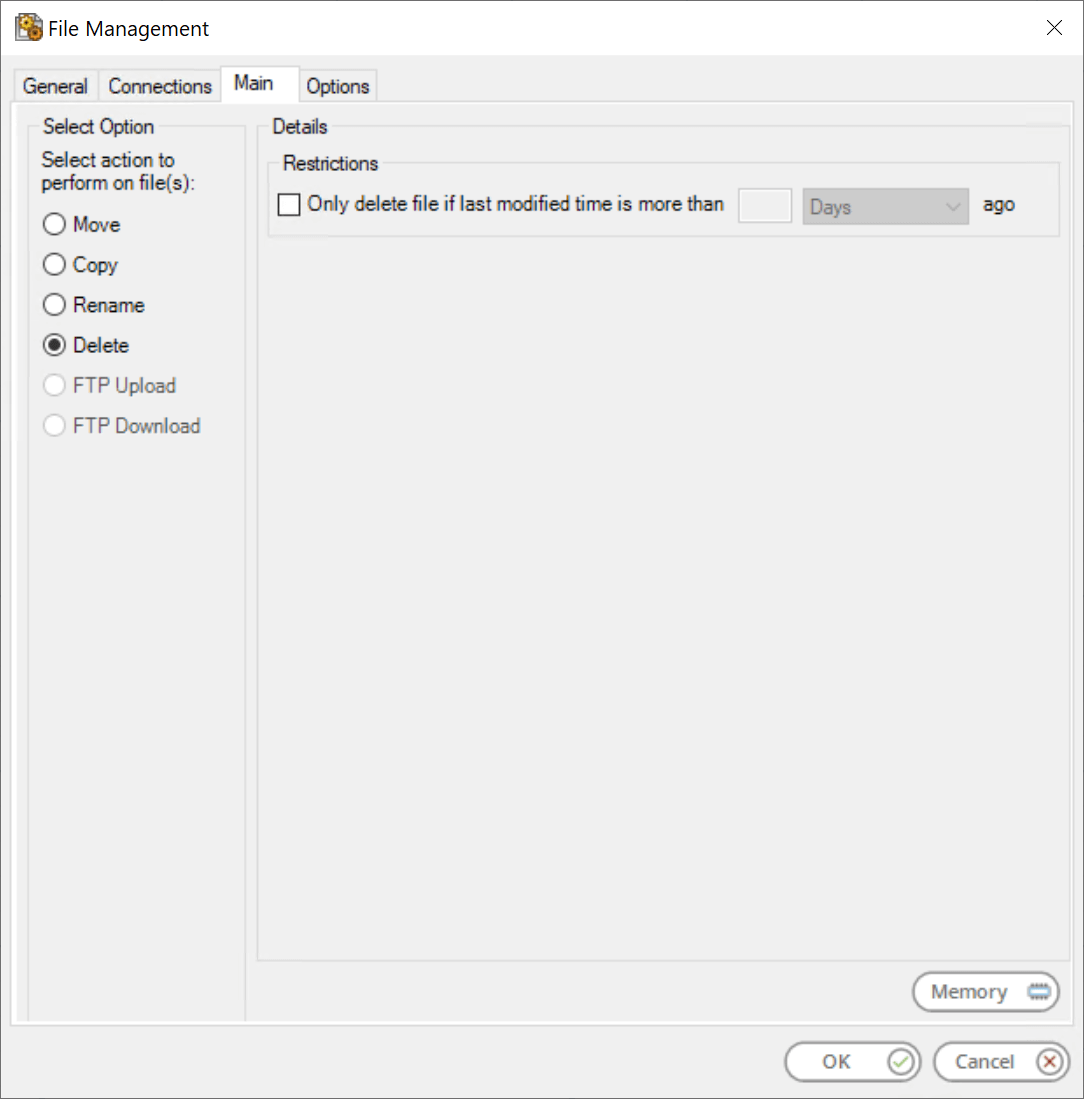
You can choose to delete source files based on a specified modification time period of:
If required, drag-and-drop a recordset column or variable from the Task Browser to create a dynamic value.
Optionally, use Memory to memorise some or all of the step output for use in other task steps. This is particularly useful when the File Management step is called multiple times — use Memory to compare the document previously processed to the new document currently being processed to avoid duplicates
FTP Upload
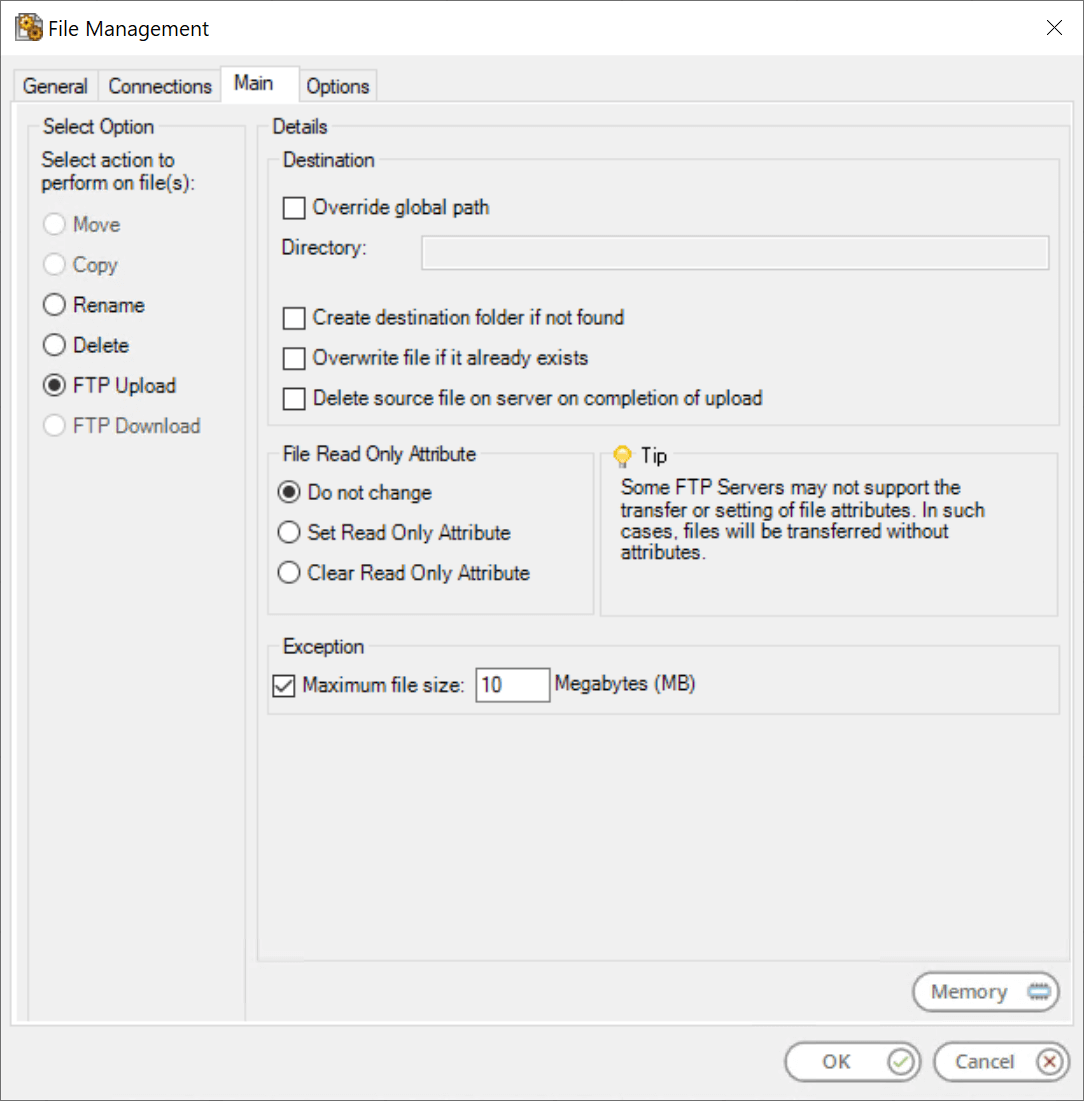
When uploading files to an FTP or HTTP server, you must choose how the files will be handled at runtime:
If required, use the settings in the File Read Only Attribute pane to adjust the uploaded file’s properties. Note that not all file systems support the transfer or setting of file attributes. In such cases, the files will be transferred without attributes.
You must specify the Maximum file size (in MB) that the File Management tool can upload. Any matching files larger than the specified size are not uploaded. This field is mandatory and defaults to 10 MB.
Optionally, use Memory to memorise some or all of the step output for use in other task steps. This is particularly useful when the File Management step is called multiple times — use Memory to compare the document previously processed to the new document currently being processed to avoid duplicates.
FTP Download
Download Whitepaper
When downloading files to an FTP or HTTP server, you must choose the Destination for your source files:
If required, use the settings in the File Read Only Attribute pane to adjust the downloaded file’s properties. You must specify the Maximum file size (in MB) that the File Management tool can download. Any matching files larger than the specified size are not downloaded. This field is mandatory and defaults to 10 MB.
Use Memory to memorise some or all of the step output for use in other task steps. This is particularly useful when the File Management step is called multiple times — use Memory to compare the document previously processed to the new document currently being processed to avoid duplicates.
About the Options Tab
The Options tab allows you to define how errors in this step are handled at task runtime.
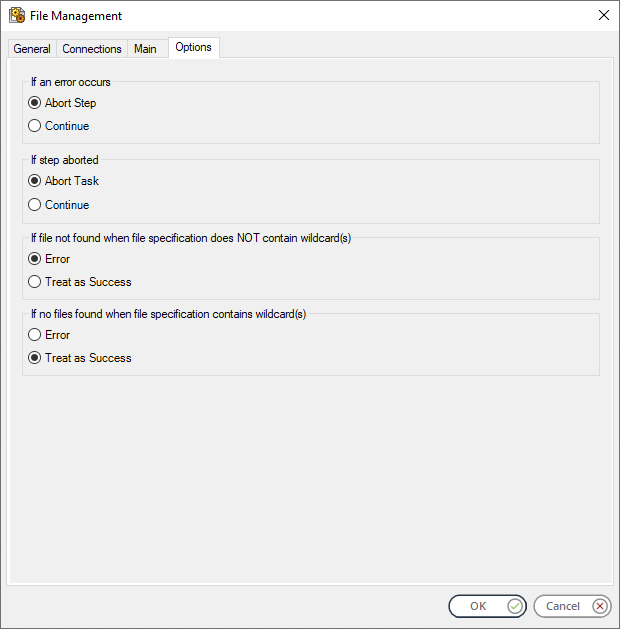
If an error occurs, you can decide whether the step should Continue processing, or terminate the step immediately (Abort Step).
If the step is aborted, you can choose to Continue processing onto the next step in the task, or terminate the whole task immediately (Abort Task).
If file not found when file specification does NOT contain wildcard(s) you can choose to continue processing onto the next task step (Treat as Success) or fail the File Management step (Error).
If no files found when file specification contains wildcard(s) (see General tab), you can choose to continue processing onto the next task step (Treat as Success) or fail the File Management step (Error).