Introduction
The Save File tool enables users to save one or more documents to a nominated file storage provider or file server location, either based on recordset, document or XML source content produced in preceding task steps or from some static value (either manually entered or sourced from the task browser).
For example, save HTML output from a Format as HTML step as one or more .HTM files to send as an email, or save output from a Format as Text step as a .CSV file for use by another application, such as Microsoft Excel.
By default, the Save File tool saves files to an on-premises server without the need for additional configuration. However, if saving files to cloud-based storage then connection settings will need to be established within the tool’s global configuration.
Features
- Ability to save one or more files to SharePoint Online, OneDrive, and Google Drive.
- Ability to save one or more files to the local file system.
- Supports static or dynamic paths and file names.
- Any file type such as
.HTMor.CSVprovided by step outputs - Save a columns value from an Input step, such as Database Query (ODBC), into a file
- Memory features to memorise task data created at run-time
Working with other Tools
The Save File tool can interact directly with the following tools:
Consuming from Other Tools
The Save File tool can consume objects outputted by the following tools:
| Icon | Tool Name | Tool Category |
|---|---|---|
| Database Query (ODBC) | Input and Data Connectors | |
| Database Query (OLEDB) | Input and Data Connectors | |
| Import Flat File | Input | |
| Import XML Document | Input | |
| Retrieve Text Message | Input | |
| Convert Recordset to XML | Format | |
| Convert XML to Recordset | Format | |
| Create Workflow Job | Format | |
| Format as Flat File | Format | |
| Format as HTML | Format | |
| Format as HTML Pro | Format | |
| Format as Text | Format | |
| Run Crystal Report | Format | |
| Run Microsoft Reporting Services | Format | |
| Run Microsoft Word (Merge) | Format | |
| Transform Data | Format | |
| Call Task | Execute | |
| Filter Data | General | |
| Applications Platform Connector | Data Connectors | |
| Web Service Connector | Data Connectors |
In addition, the Save File tool can consume the output from other Data Connector tools that provide connectivity to an external application, such as an eCommerce, ERP or CRM system.
Objects Consumed
The following objects, outputted by the above tools, can be consumed by the Save File tool:
- Recordset — Tabular data from any BPA Platform tool capable of exposing such data (see above)
- XML — XML data from any BPA Platform tool capable of exposing such data (see above)
- Documents (Any) — Documents of any type
Exposing to Other Tools
As an Output category tool, Save File does not expose any objects that can be directly consumed by another tool. However, it does expose the following objects which can be used in a task step sequence:
- RecordSource — If an Input Recordset has been selected, this contains the columns included in the recordset
- DocumentSource — If a Document Source has been selected, this contains the data in the document as recordset columns
- Memory Definitions — If configured, this is a list of Memory Definitions created for the step and the recordset columns to be memorised for each one
- Step Properties — Standard step properties are available allowing you to use statistical data of the tool
Global Configuration
The global configuration for Save File is used to Add, Edit, or Remove connections to selected external file and cloud-based storage providers, such as SharePoint Online, OneDrive, or Google Drive.
You access the Save File – Global Configuration interface from the resources tree — expand System > Tools > Output and double-click Save File in the items list.
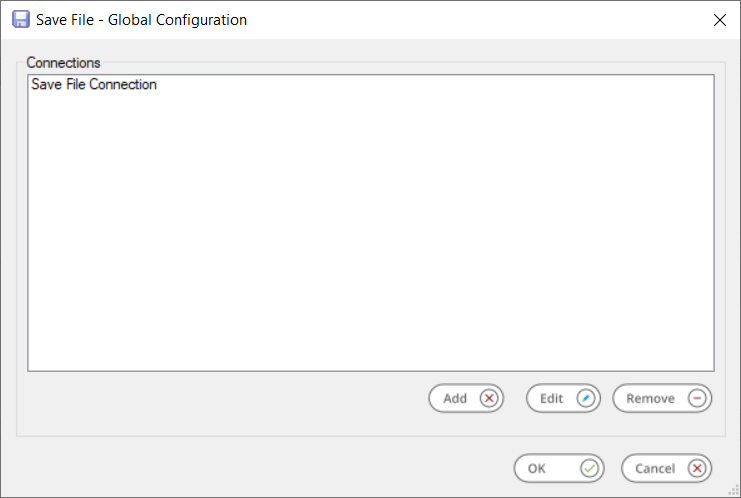
Click Add to create a new connection to one of the supported file system providers.
Use Edit and Remove to manage your existing connections.
Creating Save File Connections
Provide details and establish connection to an external file system.
About the General Node
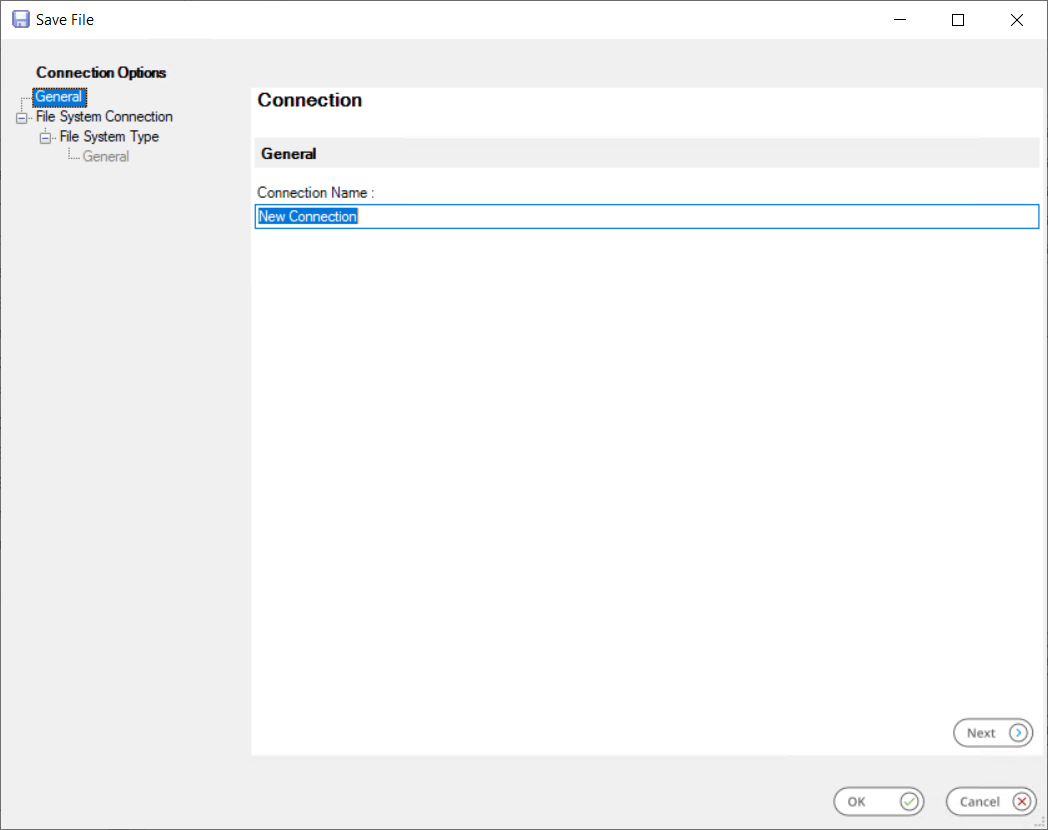
Enter a unique Connection Name. If adding connections for different types of file system provider, it is recommended you add such details to the connection name to enable you to identify each connection.
About the File System Connection Node
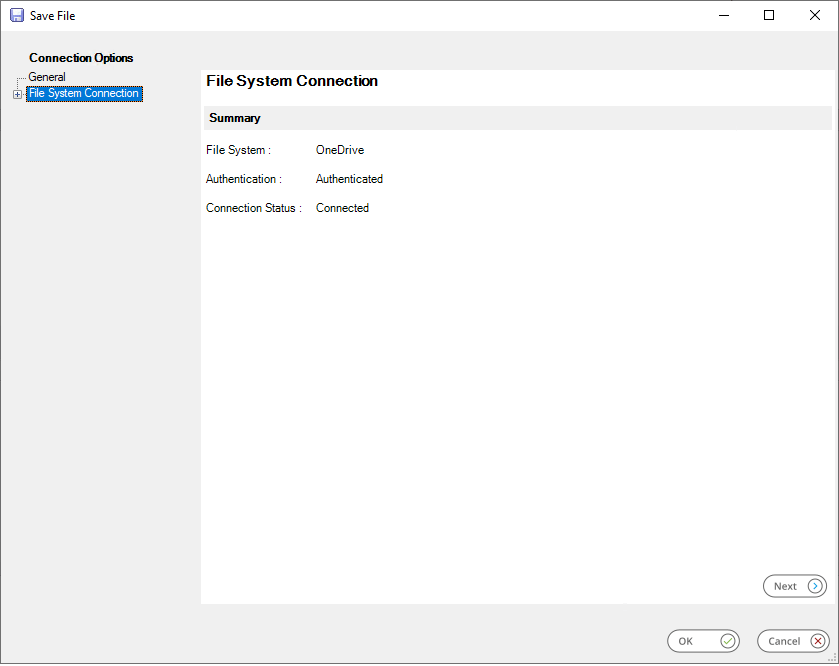
The File System Connection node, selectable in the Connection Options tree, provides a summary of the connection settings which have been defined in the subsequent File System Type and General node pages. Where no configuration has taken place, the default values for each field will appear as Unknown.
About the File System Type Node
The required File System Type can be selected from the list of supported external file storage providers.
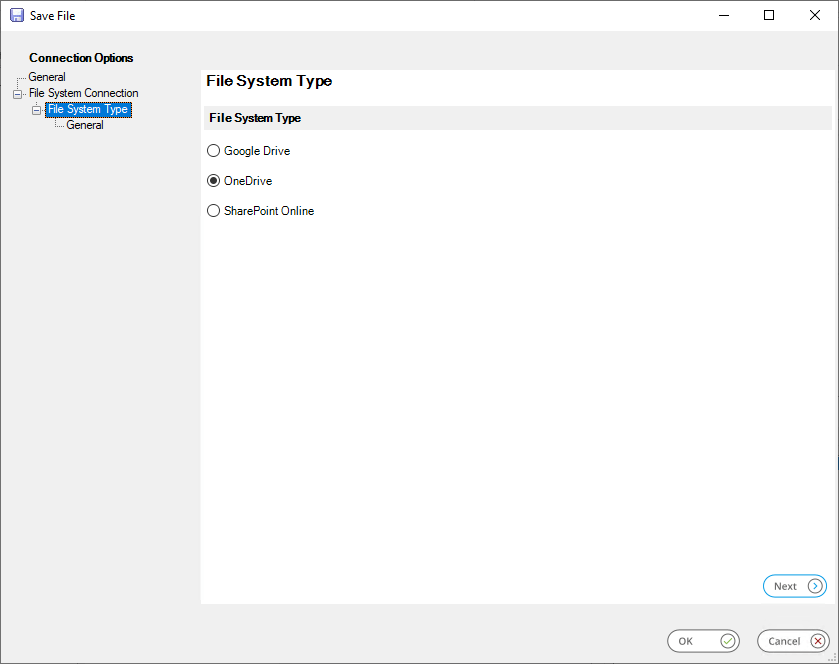
About the File System Type > General node
Following the selection of an external file storage provider type the General node will be enabled. Clicking Authorise will open an external window displaying fields required to complete multi-factor authentication for the selected provider.
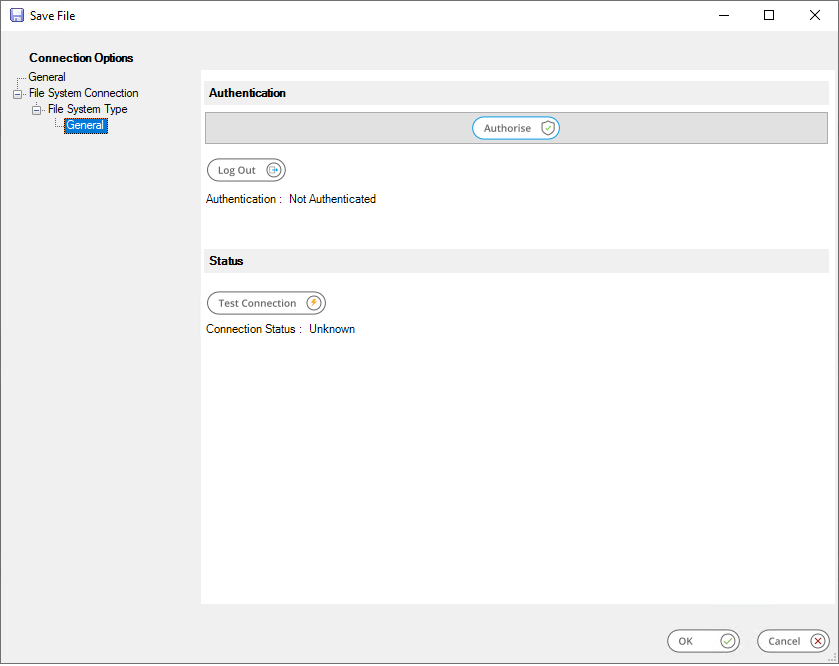
Once initial authentication is established, the Test Connection button can be used to confirm the connection. The Save File Tool will automatically manage and update the tokens needed to keep the connection live using our standard Token Manager.
The Log Out button can optionally be used to disconnect an established connection. The authorisation process must be repeated if reconnection is subsequently required.
Step Configuration
When creating new tasks, Save File is located under Output in the Task Browser.
To add a new Save File step to an existing task, you either:
- Click and drag the Save File icon from the Task Browser to the task Design area.
- From the task’s Design tab, right-click on empty space and select Add > Output > Save File
– OR –
For a detailed description of how to create new tasks, refer to the product help.
About the General Tab
The General tab is used to Name, describe (Description), and to enable and configure the optional Read data from a source settings for the Save File task step.
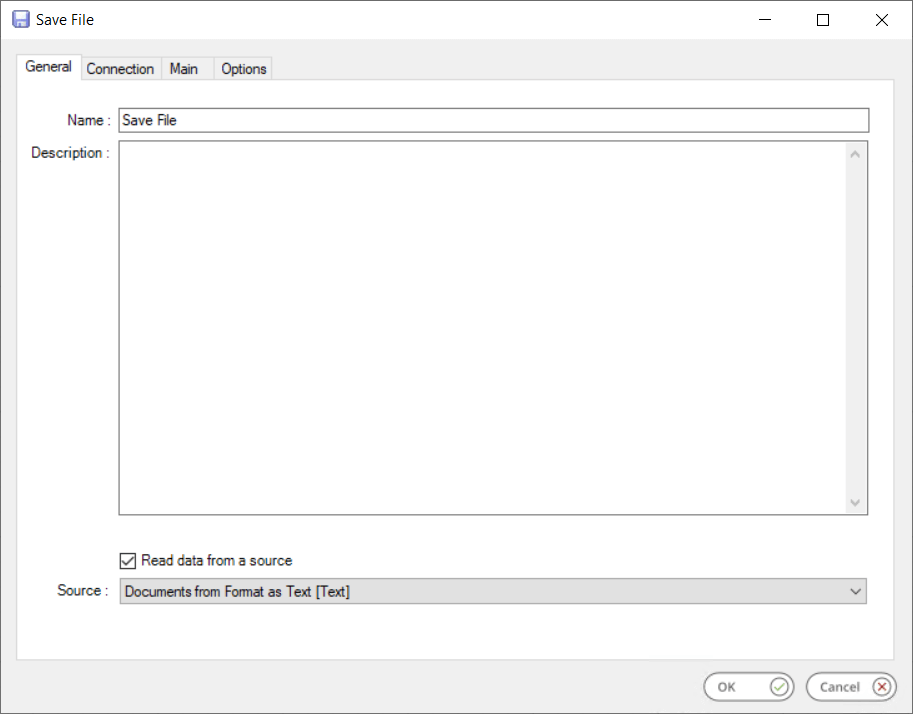
Enter a unique task step Name.
The Description entry, although optional, can be used to store information relating to the Save File task step.
The Read data from a source option is available if steps are present in the task which output recordset, document or XML data. This can be selected if any of those outputs are required when saving a file. One of the available Source entries can then be chosen, making its data available to the Save File step at runtime.
For addition information on data outputs that can be consumed by Save File, go to the Working with Other Tools.
About the Connection Tab
The Connection tab is used to establish a connection to the Save File output location.
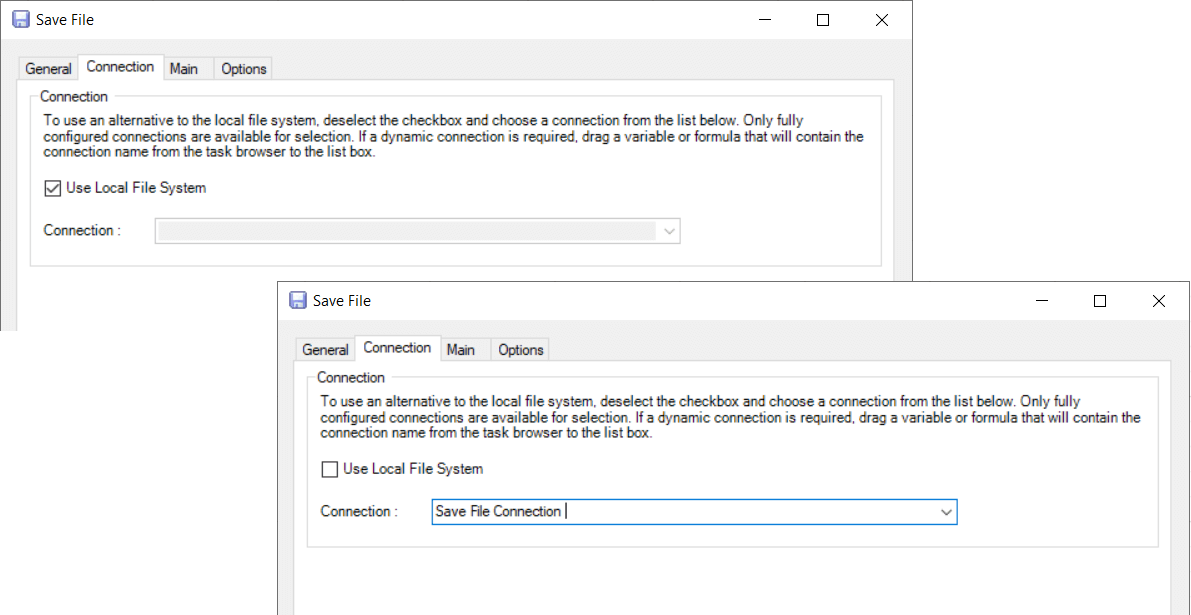
By default, the Save File tool will save files to the local file system.
If connections to other file storage providers are available, then the step can be configured to save files to those locations. To do this, clear the Use Local File System check-box to enable the Connection drop-down and select from the connection settings previously set-up in the Global Configuration.
Use a BPA Platform variable or formula to create a dynamic connection, where the connection used is determined by runtime circumstances. At runtime, the contents of the variable must match the name of one of the global connections — this is case-sensitive
About the Main Tab
Use the Main tab to set the Saved File path and filename.
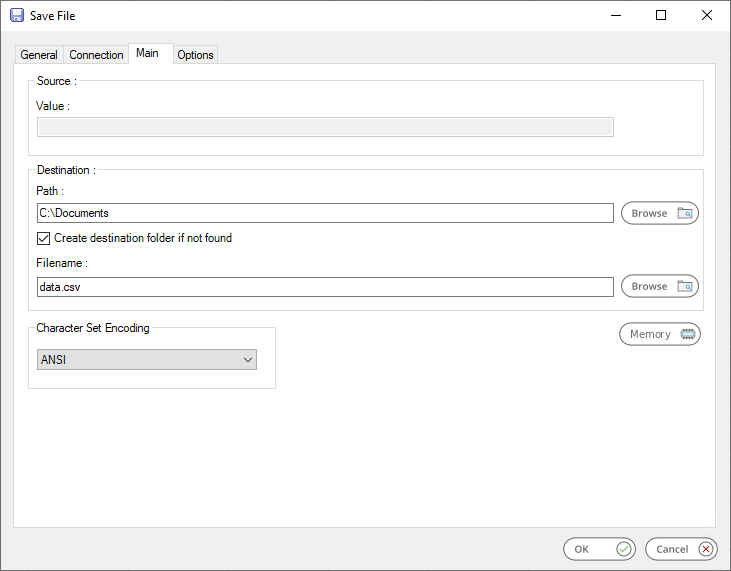
If this task step consumes a recordset (see General tab), use the Value field to specify the saved file’s contents. You drag-and-drop a single variable or recordset data element from the Task Browser to build the file’s contents, or manually enter a value.
However, if the task step is consuming a document or XML source the selected source will form the saved file’s contents and the Value field will be disabled.
To specify the saved file’s destination Path, manually enter the path details or click the Browse button to locate and select the required output folder. The presented folder structure is dependent on the file server or file system provider that was selected in the Connection tab. You can use an existing folder or enable Create destination folder if not found to have the Save File step create the folder automatically if it cannot find the one specified. You can drag-and-drop variables and recordset data from the Task Browser to build the file path or create a dynamic entry depending on run-time data.
To specify the saved file’s Filename, manually enter the filename details or click the Browse button to locate and select the required output filename. You can drag-and-drop variables and recordset data from the Task Browser to build the filename or create a dynamic entry depending on run-time data.

The above configuration results in filenames of:
CustomerRecords_1.txt
 CustomerRecords_2.txt
 CustomerRecords_3.txt
and so on.
By default, all saved files use ANSI encoding. If a different Content Encoding is required, select this from the drop- down.
Use Memory to memorise some or all of the step output for use in other task steps. This is particularly useful when the Save File step is called multiple times — use Memory to compare the document previously processed to the new document currently being processed to avoid duplicates.
About the Options Tab
The Options tab allows you to define how errors in this step are handled at task runtime.
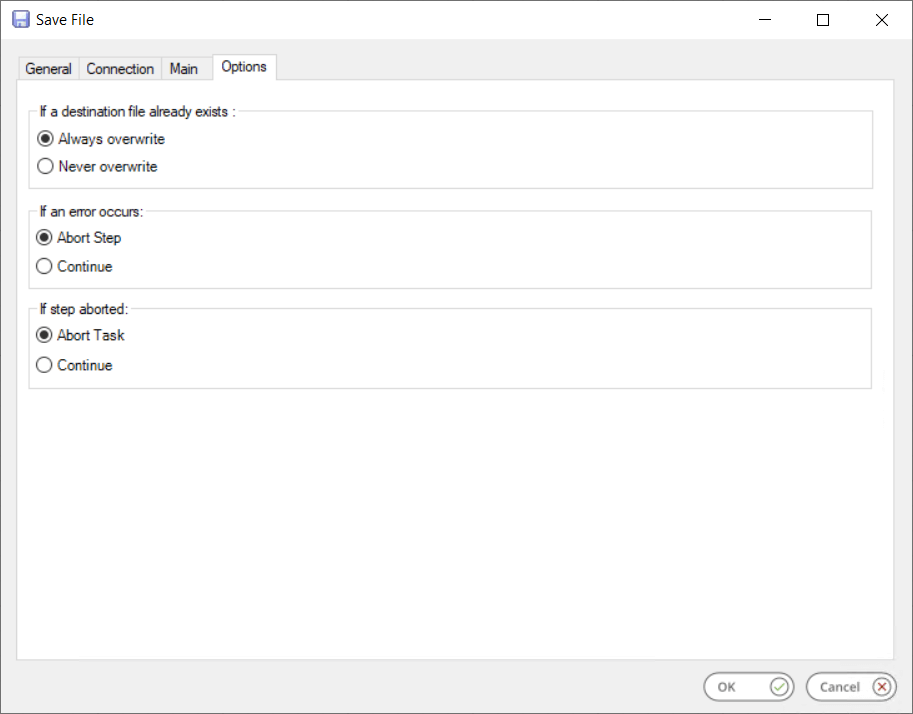
If a destination file already exists, you can chose whether to Never overwrite or Always overwrite.
If an error occurs, you can decide whether the step should Continue processing, or terminate the step immediately (Abort Step).
If the step is aborted, you can choose to Continue processing onto the next step in the task, or terminate the whole task immediately (Abort Task).