Summary
The purpose of this article is to provide an example approach to forwarding organisational email to the Email Trigger (SMTP) Agent for use by an SMTP step.
This document is not intended to be used as a definitive guide or instruction.
Configuration for the Email Trigger (SMTP) Agent
Ensure SMTP Virtual Server is installed, configured, and running on the server where the Email Trigger (SMTP) Agent is installed — for more information, see our knowledge base article: Configuring the SMTP Virtual Server for the Email Trigger (SMTP) Agent and Installing and Configuring the Email Trigger (SMTP) Agent.
Creating the Email Recipient and Sender
First, create the TaskCentre email address recipient and, if it does not already exist, the mailbox where emails are forwarded from.
Create the TaskCentre Email Contact
Log into your Exchange Admin Centre.
Go to recipients > contacts.
Click ![]() .
.
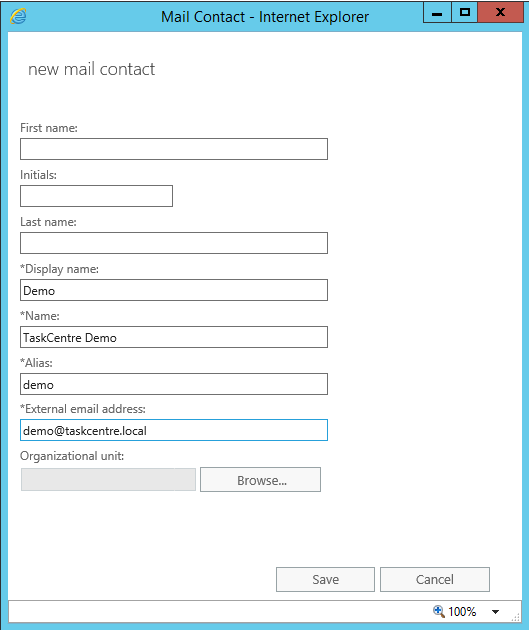
Select Mail contact
Enter the new contact’s details as required.

Create the Mailbox
Go to recipients > mailboxes.
Click ![]() .
.
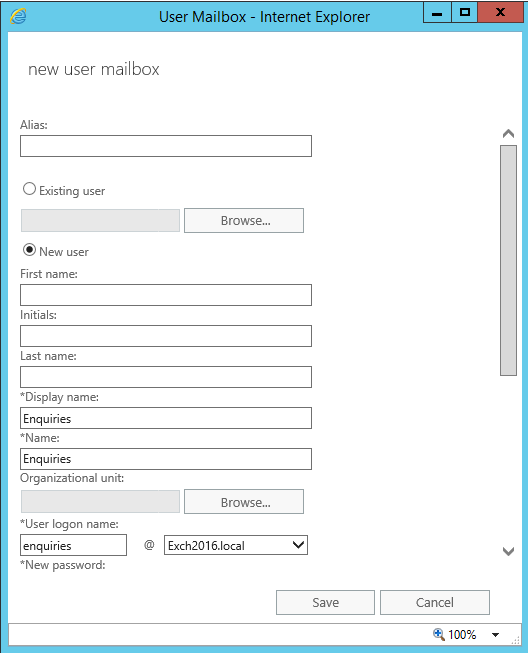
Select User mailbox.
Enter the mailbox details as required.

Forwarding the Mailbox
Now create the forwarding “rule” to forward all emails received. From the examples above, emails received by [email protected] are forwarded to [email protected].
Go to recipients > mailboxes.
Highlight the new mailbox.
Click ![]() .
.
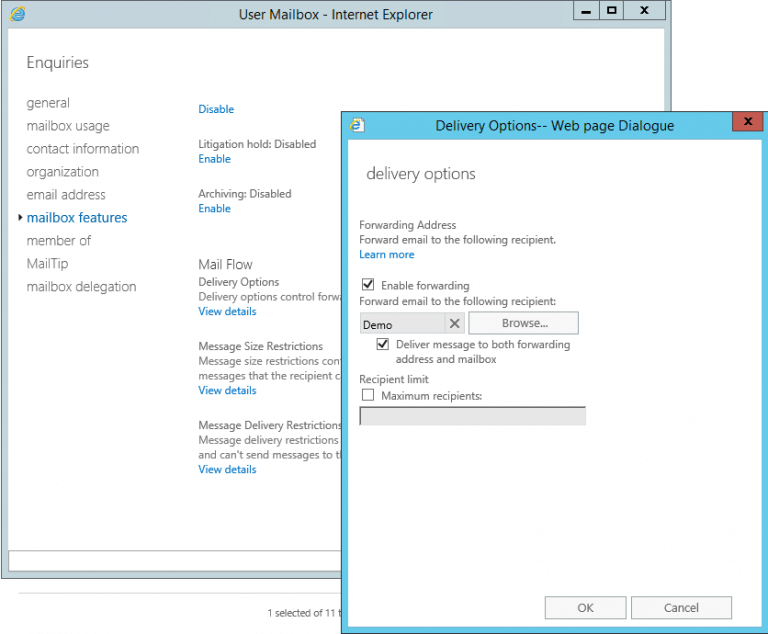
Go to mailbox features.
Scroll down to Mail Flow, and click View details.
Select Enable forwarding.
Add the mail contact from Create the TaskCentre Email Contact.
Ensure Deliver message to both the forwarding address and mailbox is selected. This keeps a copy of the email on the Exchange Server.

Adding the Send Connector to Forward the Emails
Go to mail flow > send connectors.
Click ![]() .
.
Create a Custom send connector with the following:
Network settings
- Select Route mail through smart hosts
- Add a new SMART HOST using either the fully qualified domain name (FQDN) or the IP address of the TaskCentre server where the Email Trigger (SMTP) Agent is installed
Smart host authentication
- Select and configure the appropriate authentication method for your domain.
Address space
- Add an SMTP address space, using the FQDN of the TaskCentre server
Source server
- Add the mailbox server(s) which will forward the emails to the smart host (the TaskCentre server)
Set-SendConnector command in the Exchange Management Shell, details of which are outside the scope of this article.Finally, you need to add TaskCentre’s IIS domain to Exchange:
Go to mail flow > accepted domains.
Click ![]() .
.
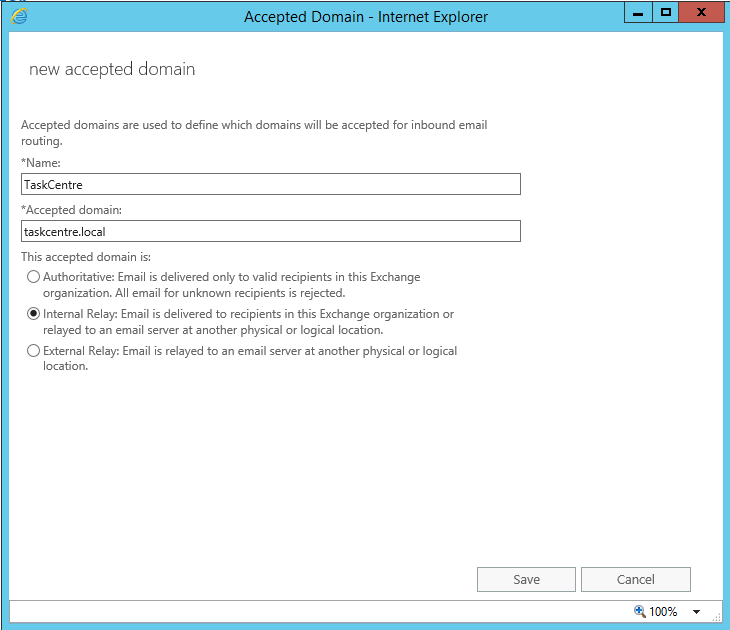
Add the FQDN of the TaskCentre server to Accepted domain.
Select Internal Relay.

Now when emails are sent to your specified mailbox, they will be forwarded to the server where the Email Trigger (SMTP) Agent is installed.
For a detailed description of how to setup the same on Exchange 2010, see our knowledge base article: Forward Mail to Email Trigger (SMTP) Agent – Exchange 2010.