Introduction
The Send Text Message tool is used to create and send data-driven, personalised text messages to employees, customers, prospects, suppliers, and so on. Sending can be automated to guarantee the timing of the text messages.
At the time of writing, only plain text can be sent; images and other multimedia are not supported.
Dynamic messages and recipients can be created using BPA Platform variables.
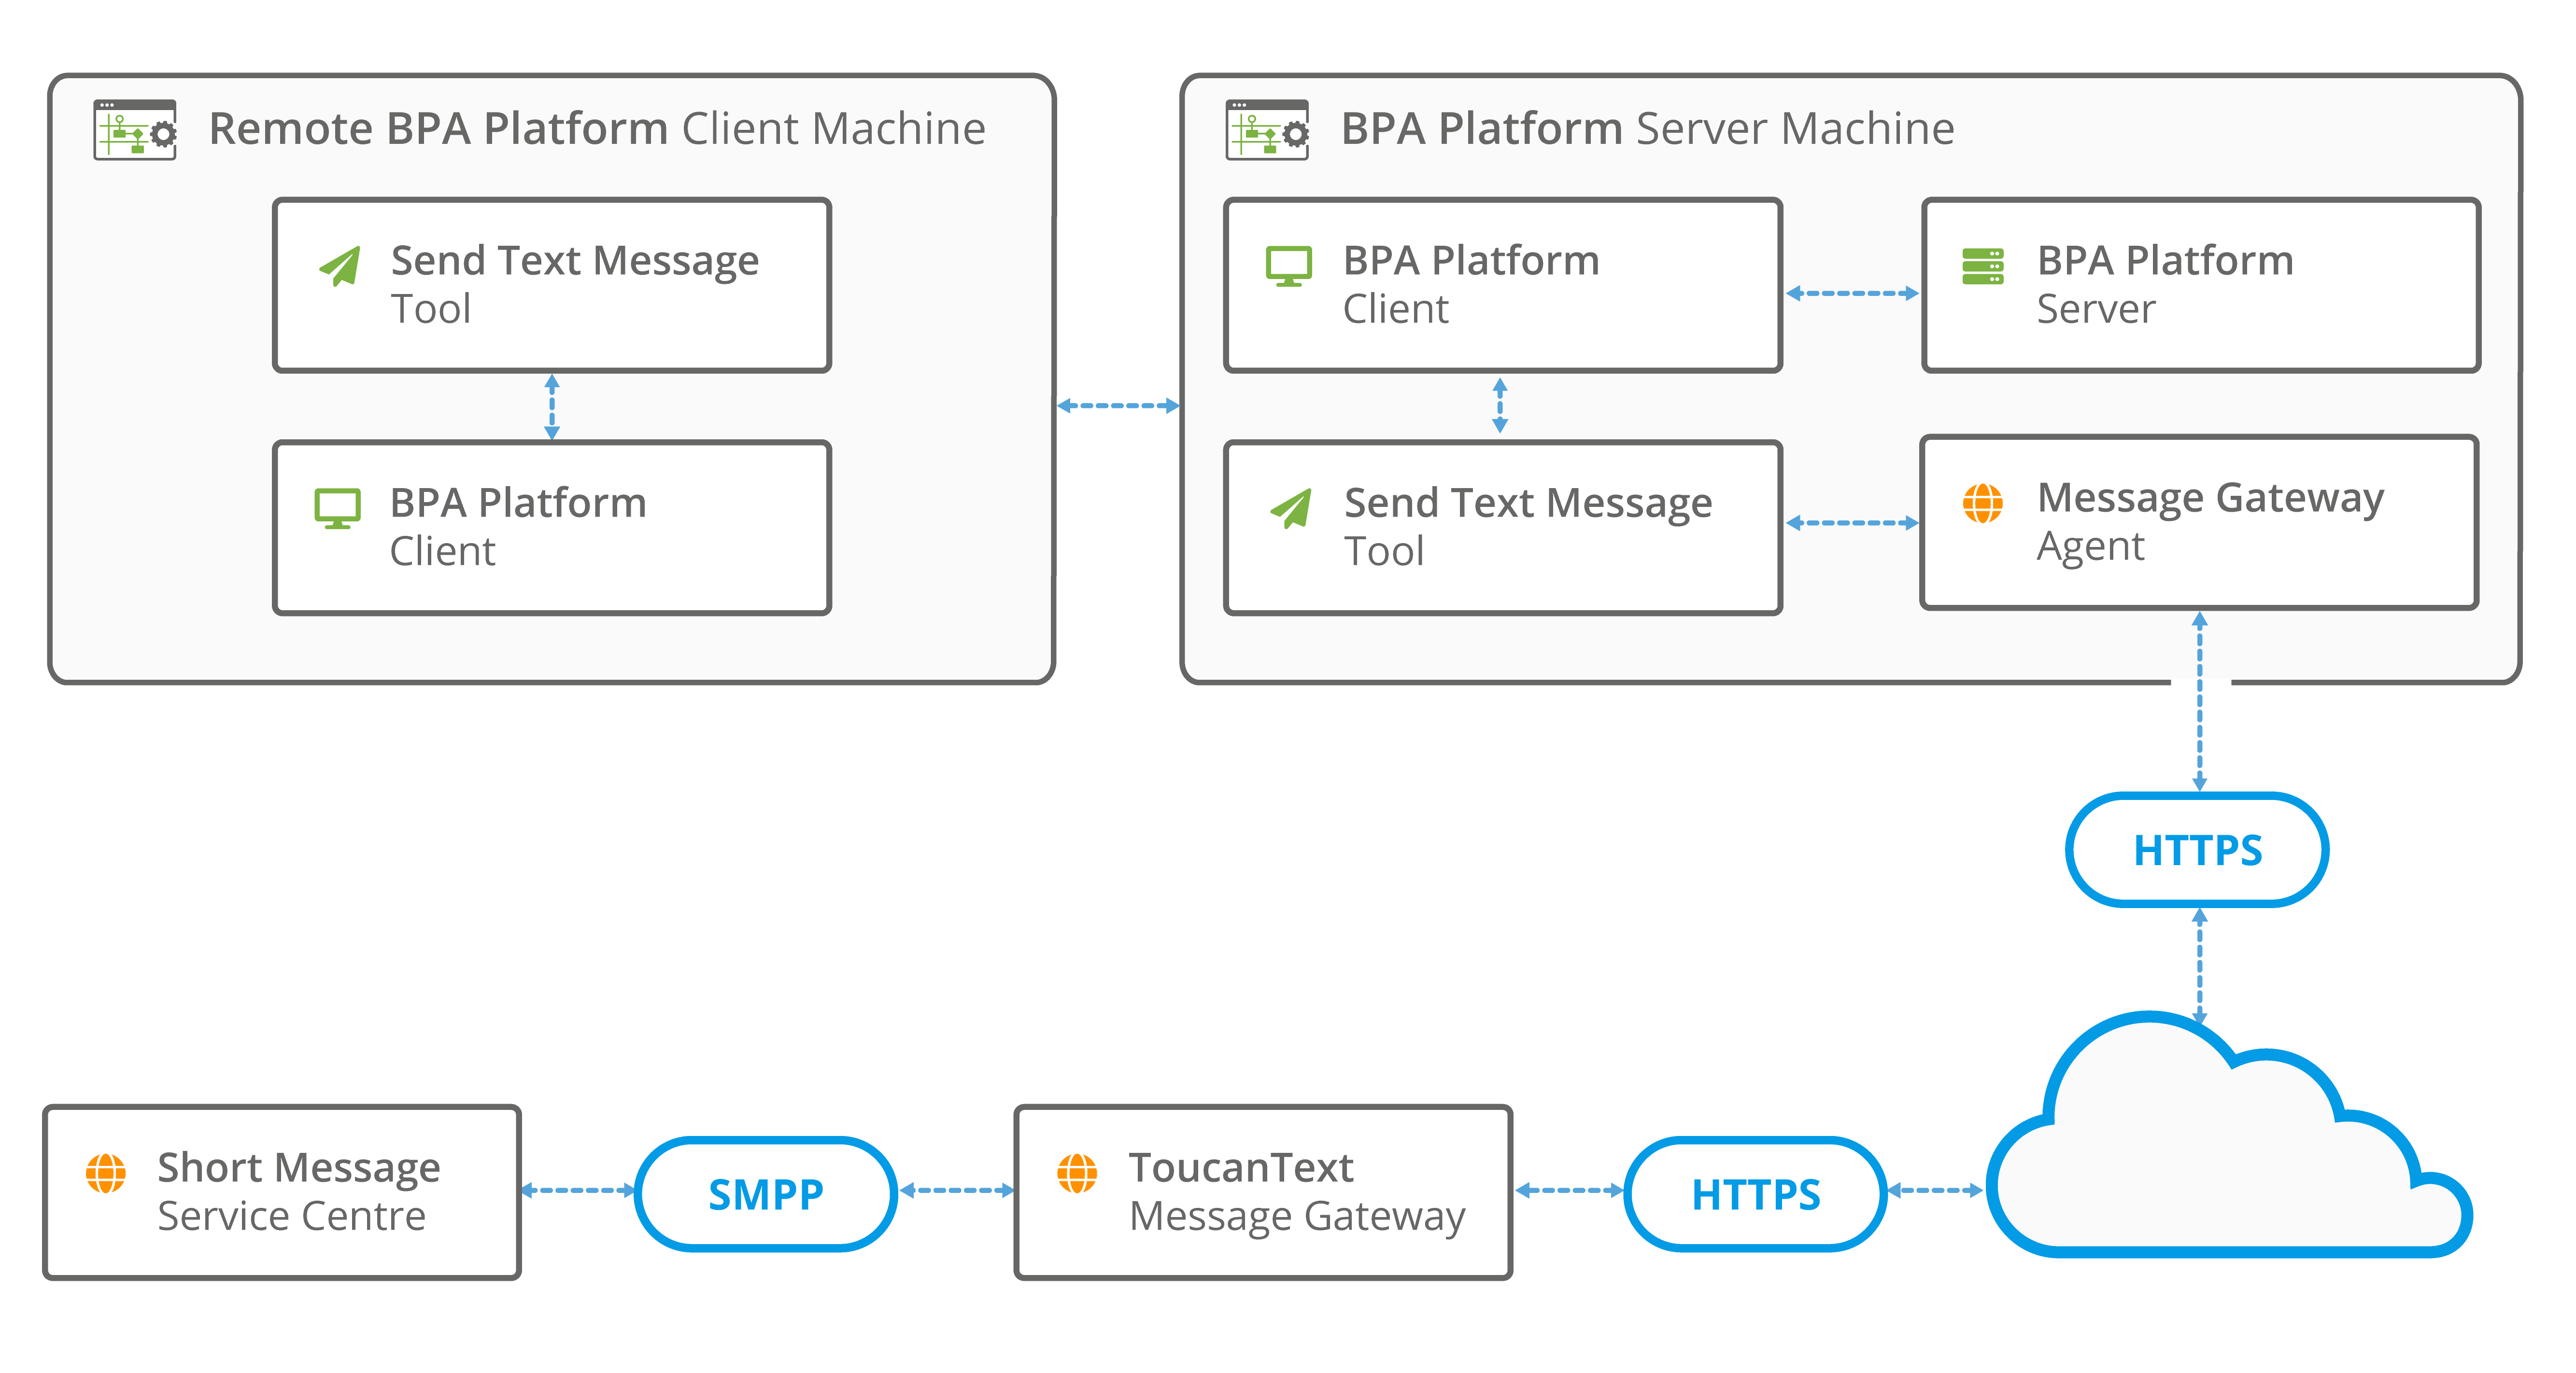
The Send Text Message tool makes use of the Message Gateway Agent service (see About the Message Gateway Agent), ToucanText Message Gateway, and the Microsoft Message Queuing (MSMQ) service to ensure all text messages are sent correctly. It is the MSMQ that provides resilience to the Send Text Message tool.
Features
- Merge message with data from other task steps
- Static or dynamic recipients
- Multiple recipients
- Memory feature to memorise task data created at runtime
Send Text Message Example Use-Cases
- Send text alerts when stock levels fall below a threshold
- Keep customers updated with their order statuses, delivery notifications, event and appointment reminders, and so on
- Conduct customer surveys over text
- Marketing campaigns with promotion codes
- Send text alerts when monitored technology fails
Technical Summary
Working with other Tools
The Send Text Message tool interacts directly with the following tools:
Consuming from Other Tools
Send Text Message can directly consume objects outputted by the following tools:
| Icon | Tool Name | Tool Category |
|---|---|---|
| Create Workflow Job | Format | |
| Format as Flat File | Format | |
| Format as Text | Format | |
| Run Crystal Report | Format | |
| Run Microsoft Word (Merge) | Format |
Objects Consumed
The Send Text Message tool can use the following objects exposed by the above tools:
- Documents (Text) — Plain text documents
Exposing to Other Tools
As an Output category tool, Send Text Message does not expose any objects that can be directly consumed by another tool. However, it does expose the following objects which can be used in a task step sequence:
- DocumentSource — If a Document Source has been selected, this contains the data in the document as recordset columns
- Step Properties — Standard step properties are available allowing you to use statistical data of the tool
Architecture
The Send Text Message tool can be installed on any machine where the BPA Platform client is also installed. For remote installations, this is only for the purpose of running Send Text Message tasks.
The Message Gateway Agent must be installed on the BPA Platform server. This allows access to the Queue Manager in global configuration. At the time of writing, remote installations of the Agent are not supported.
About the Message Gateway Agent
The Message Gateway Agent communicates with the ToucanText Message Gateway. It runs as a service on the BPA Platform server, passing requests from the Send Text Message tool and the Message Gateway.
The Message Gateway makes use of the MSMQ service to queue text messages for sending. Failed messages are also processed through the Message Gateway, allowing them to be re-queued or deleted.
The Message Gateway Agent must be installed on the BPA Platform server. This allows access to the Queue Manager in global configuration. At the time of writing, remote installations of the Agent are not supported.
Global Configuration
The global configuration for the Send Text Message tool is used to create connections to the ToucanText accounts used to handle the sent text messages.
You access the Send Text Message – Global Configuration interface from the resources tree — expand System > Tools > Output and double-click Send Text Message in the items list.
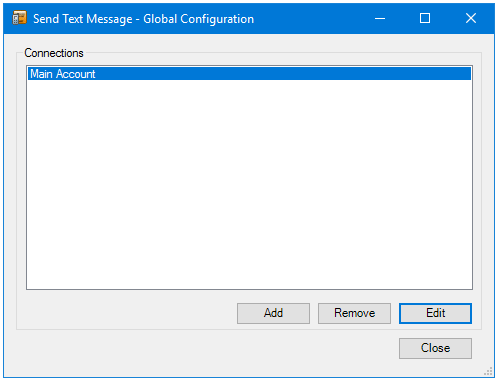
Click Add to create new connections.
Use Remove and Edit to managed your existing connections.
Connecting to the Text Message Provider
You must configure the connection to the text message provider before adding the Send Text Message tool to a task.
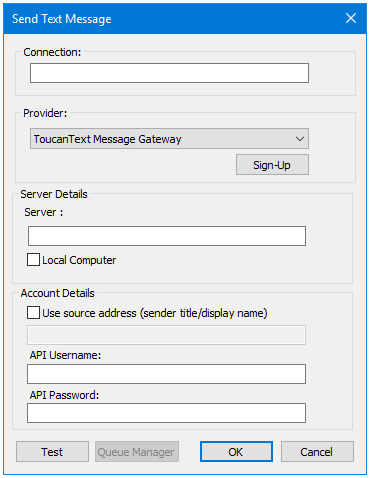
Add a unique Connection name.
Choose the relevant text message Provider from the drop-down — note that the parameters differ slightly depending on the chosen provider. The example above is for the default and recommended provider of ToucanText.
Where Provider is ToucanText
If you do not have a ToucanText account, click Sign-Up. This redirects you to the ToucanText website where you can create the account and request prepaid message credit.
In Server Details, you either:
- Enter either the hostname or the IP address of the BPA Platform server hosting the ToucanText Message Gateway
- If the gateway is located on the same computer as this instance of BPA Platform, select Local Computer
By default, text messages are sent from “ToucanText“. To change this, enable Use source address (sender title/display name), and enter the new “sender” in the box below. This can be a valid mobile number or a string up to 32-characters long.
Enter the credentials (API Username and API Password) of the ToucanText account used to send text messages.
Use Test to ensure the message gateway can be connected to using the provided credentials. Note that a text message balance check is performed at the same time.
Each connection has its own individual message queue. This prevents failures or issues within one connection from impacting on messages in any other connections that might exist. The read-only Queue ID field is populated at the point of connection creation and can be used to distinguish one message queue from another when multiple connections exist.
Queue Manager — Local Installations Only
Use Queue Manager to view those text messages that have failed delivery.
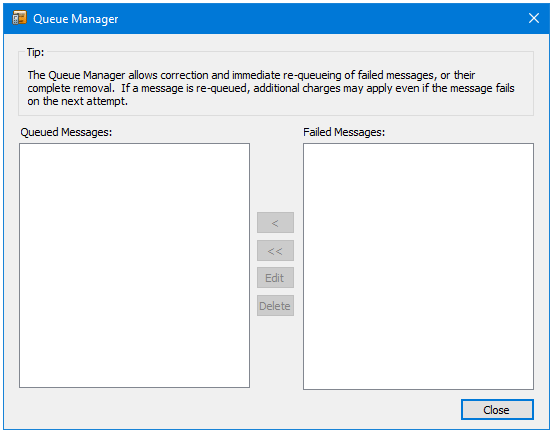
Messages may fail delivery because the mobile number cannot be routed for delivery, running out of credit on the ToucanText server, or the incorrect credentials being entered in the global configuration for example.
From here, you can re-queue failed messages (suitable for when ToucanText credit has been “topped up”), or delete them from the queue completely.
Where messages have failed because incorrect credentials have been used, no further action is required in the Queue Manager. Once the username or password have been corrected, a confirmation message advising the messages will be resent is shown.
Step Configuration
To add a new Send Text Message step to an existing task, you either:
- Click and drag the Send Text Message icon from the Task Browser to the task Design area.
- From the task’s Design tab, right-click on empty space and select New > Output > Send Text Message.
– OR –
For a detailed description of how to create new tasks, refer to the product help.
About the General Tab
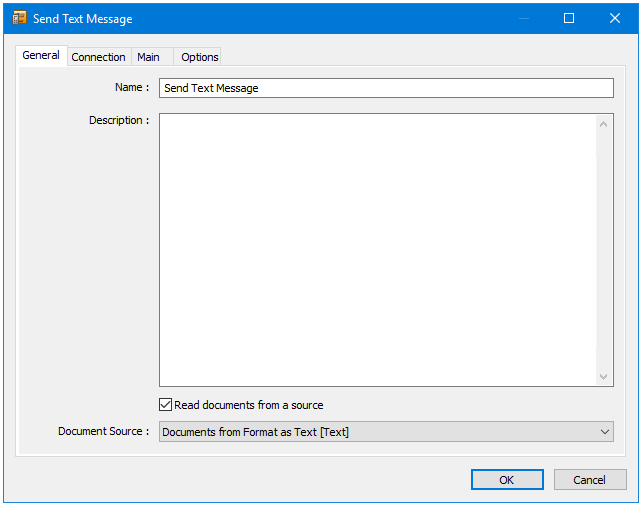
The General tab is used to Name and describe (Description) this task step.
The Document Source drop-down contains all available documents from Format steps previously created in the task; note that the document format is displayed after the step name.
About the Connection Tab
You specify the text message provider Connection this step must use.
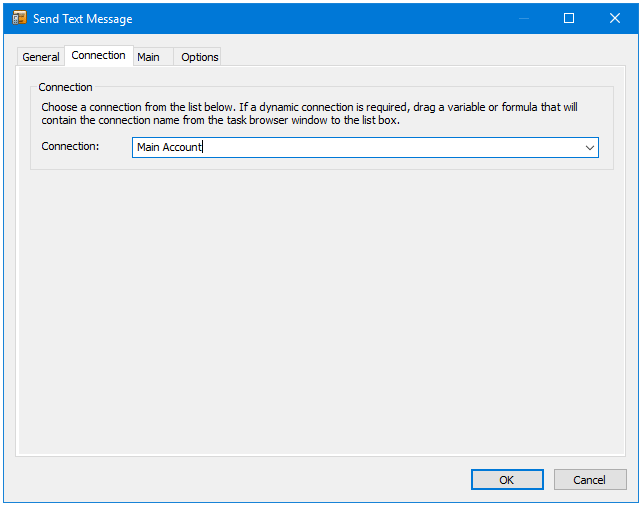
All connections created in the global configuration are presented here.
Alternatively, you can use a BPA Platform variable to create a dynamic connection, where the connection used is determined by runtime circumstances. At runtime, the contents of the variable must match the name of one of the global connections — this is case-sensitive.
About the Main Tab
You use the Main tab configure the text message:
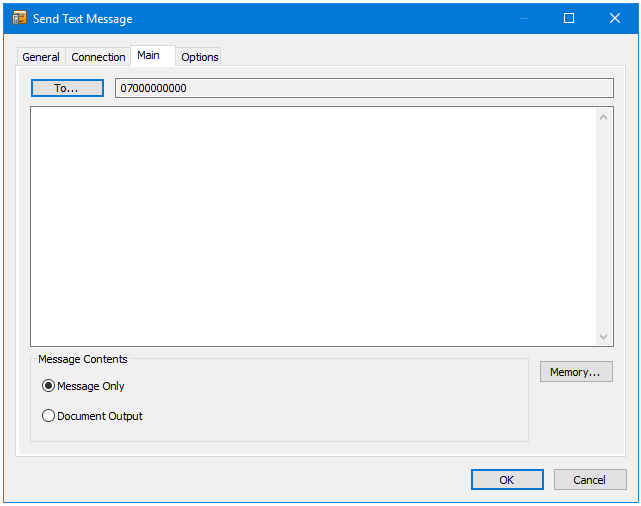
Use Memory to memorise some or all of the step output for use in other task steps. This is particularly useful when the Send Text Message step is called multiple times — use Memory to compare the text message previously processed to the new text message currently being processed to avoid duplicates.
Adding Message Recipients
Use To to select the text message recipients.
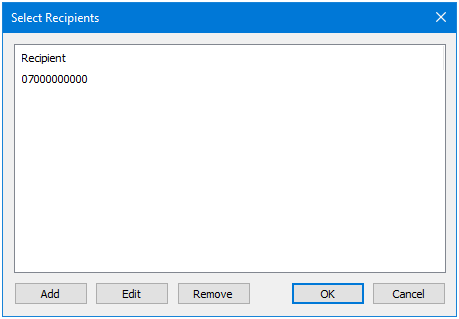
Choose the mobile or pager number(s) to send the text message to. Use Edit and Remove to manage the numbers in the Recipient list.
If the required number does not appear in the Recipient list, click Add to add new mobile or pager numbers:
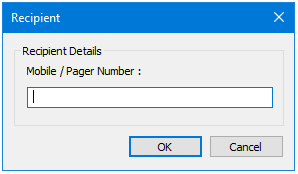
Drag-and-drop variables or recordset columns from the Task Browser to create a dynamic entry.
Adding the Text Message Content
You can choose whether the text message consists of:
- Message Only — Enable this option to create the text message in the space provided. Variables, recordset columns, and step properties can be dragged in to create dynamic data.
- Document Output — If a document from a previous task step is being consumed, enable this option to use the consumed document as the text message. Note that this does not allow you to add extra text to the text message.
About the Options Tab
The Options tab allows you to define how errors in this step are handled at task runtime.
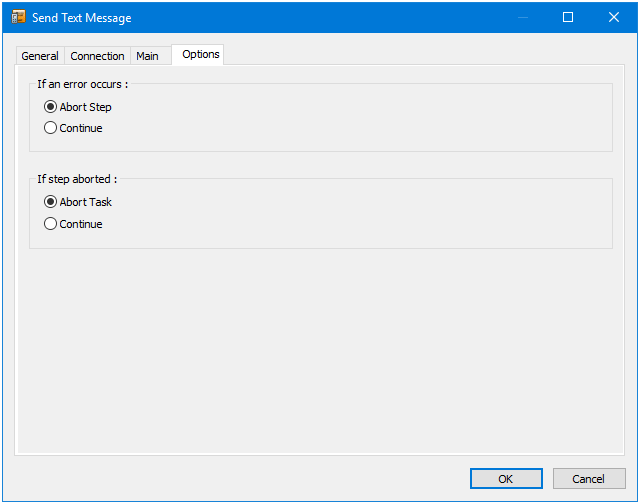
If an error occurs, you can decide whether the step should Continue processing, or terminate the step immediately (Abort Step).
If the step is aborted, you can choose to Continue processing onto the next step in the task, or terminate the whole task immediately (Abort Task).
