Summary
The Sage 300 Connector tool is able to communicate with the Sage 300 server over HTTP and HTTPS. HTTP communication is enabled by default.
This article describes how to configure both the Sage 300 and BPA Platform servers to use HTTPS.
Procedure
Prerequisites
A basic knowledge of the following is required:
- PowerShell commands
- MS-DOS commands
- How to restart server services
- Certificates — Especially their use in the Microsoft Management Console (MMC)
Step 1: Import and Configure the Certificate in the Sage 300 Server
The Sage 300 server that is hosting the Sage 300 Connector Agent requires a certificte installed with the following features:
- Includes the fully qualified domain name (FQDN)
- Includes the intended purpose of Client Authentication
- Installed to the following stores:
- Personal\Certificates
- Trusted Root Certification Authorities\Certificates
If required, for testing purposes, you can use a PowerShell script to create a “self-signed” certificate — see https://docs.microsoft.com/en-us/powershell/module/pkiclient/new-selfsignedcertificate?view=win10-ps. However, it is recommended that certificate creation, and the subsequent import into the certificate store, is performed by the server or domain administrator responsible for the Sage 300 server.
To import the certificate and its .PFX file (together with its password), do the following:
- From the Sage 300 server, open a command prompt window as the Administrator.
- In the command window, go to the folder containing the certificate and
.PFXfile. - Enter the following command:
certutil -p PFXPassword -importPFX ComputerName.pfxwhere:
PFXPasswordis the password for the.PFXfileComputerNameis the Sage 300 server’s hostname
If the returned response is successful, continue with this procedure. If not, check and re-run the command.
The certificate should now be in the Personal\Certificates and Trusted Root Certification Authorities\Certificates stores in the Sage 300 server. You can check this using an MMC snap-in.
Step 2: Reserve a URL for the Agent in the Sage 300 Server
- From the Sage 300 server, open a command prompt window as the Administrator.
- Enter the following command:
netsh http add urlacl url=https://+:port_number/ user=EVERYONEwhere
port_numberis the TCP port used to communicate with the Event Agent (default of4207)If the returned response is “URL reservation successfully added“, continue with this procedure. If not, check and re-run the command.
For more information about using the
add urlaclcommand, go to https://msdn.microsoft.com/en-us/library/windows/desktop/cc307223(v=vs.85).aspx
Step 3: Configure the Port for the SSL Certificate for the Sage 300 Server
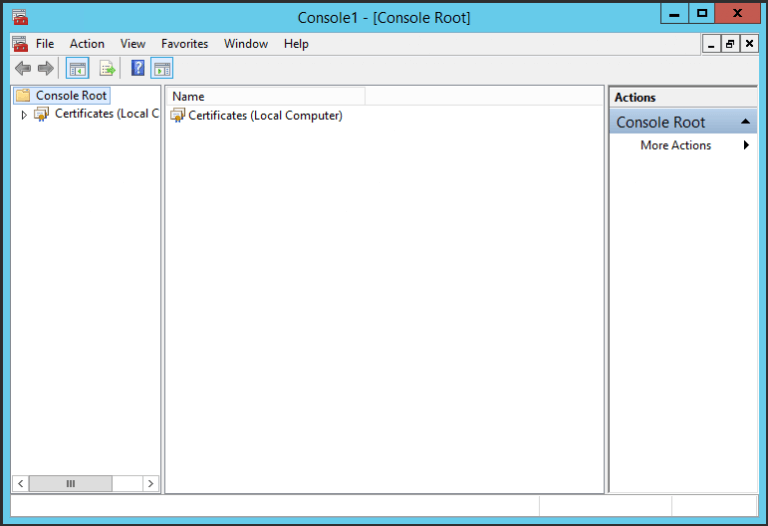
- From the Sage 300 server, open the Microsoft Management Console (type MMC in Start > Run).

- If the Certificates snap-in for the local computer has not been added previously, do the following:
- Go to File > Add/Remove Snap-in.
- From the Available snap-ins panel, double-click Certificates.
- Select Computer account, then click Next.
- Select Local computer, then click Finish.
- Click OK.
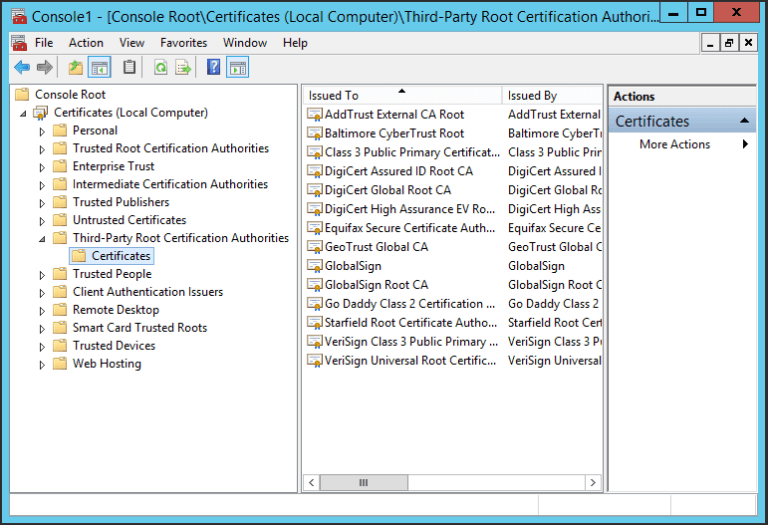
- Expand Certificates (Local Computer) > Third-Party Root Certification Authorities > Certificates.

- From the middle panel, highlight the FQDN certificate uploaded in step 1, and scroll across until you can see the Intended Purposes column.
- Ensure Client Authentication is part of the Intended Purposes.
If it isn’t, do the following:
- Right-click on the certificate and select Properties.
- Select Enable only the following purposes.
- Select Client Authentication.
- Click OK.
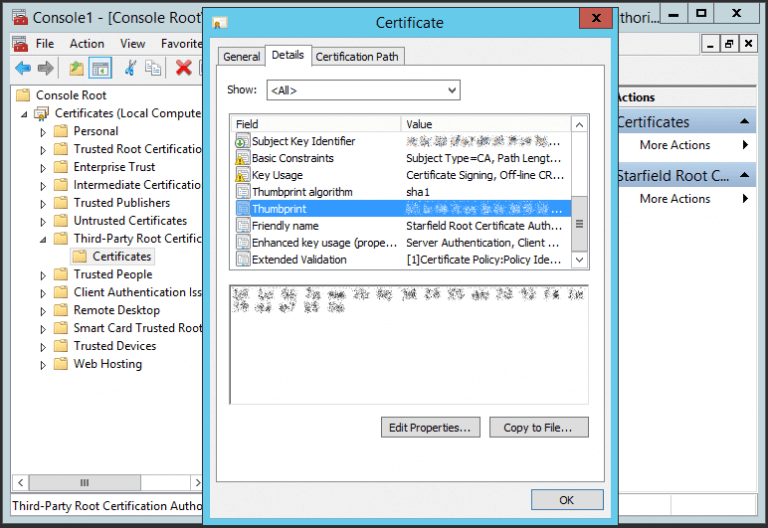
- Double-click the certificate.
- Go to the Details tab.
- Highlight the Thumbprint field.
If you cannot see this field, change Show to be <All>.

- Copy the Thumbprint text into a text editor such as Notepad. Remove all the spaces from the text.
Note that in some instances, there may be a hidden character at the beginning of the Thumbprint string; this needs removing as well.
- Open a command prompt as the Administrator.
- Enter the following command:
netsh http add sslcert ipport=0.0.0.0:port_number certhash=THUMBPRINT appid='{A86AD080-2EC6-44FB-82E4-BB1E409AB93C}'where:
port_numberis the TCP port used to communicate with the Event Agent (default of4207)THUMBPRINTis the Thumbprint text with the spaces removed
If the returned response is “SSL Certificate successfully added“, continue with this procedure.
If the returned response is “SSL Certificate add failed, Error: 1312 A specified logon session does not exist. It may already have been terminated.” check the certificate has not been removed from Personal\Certificates in the MMC.
Step 4: Export the Certificate from the Sage 300 Server
If you don’t have a .CER file for the FQDN certificate, do the following, else skip to step 5:
- Still in the Microsoft Management Console (MMC), right-click the FQDN certificate.
- Select All Tasks > Export.
- Follow the wizard, leaving all options as default, and save the certificate to a location accessible by the BPA Platform server running the Sage 300 Conector tool.
Step 5: Change the Sage 300 Connector Agent to use HTTPS
- From the Sage 300 server, go to the Sage 300 Connector installation folder (by default, this is
C:\Program Files(x86)\Sage 300 Connector Agent\. - Open
Sage300IntegrationService.exe.configin a text editor such as Notepad. Ensure you run the text editor as Administrator otherwise you cannot save the file properly. - For the ServiceUri key, enter the URI using the following format:
https://FQDN_of_the_Sage_300_server:port_numberwhere:
FQDN_of_the_Sage_300_servermatches the certificate nameport_numberis the TCP port used to communicate with the Event Agent (default of4207)
For example: https://sage-300-2017.mydomain.local:4207
- Save this change.
- Go to Control Panel > Administrative Tools > Services.
- Restart the Sage 300 Connector Agent service.
Step 6: Import the Certificate into the BPA Platform Machine
From the machine running BPA Platform and the Sage 300 Connector tool (note that isn’t necessarily the BPA Platform server; it could be a machine running just the BPA Platform client and Sage 300 Connector tool), do the following:
- Copy the
.CERcertificate created in step 4 to this machine. - Double-click the certififcate.
- Click Install Certificate in the General tab.
- From the Store Location panel, select Local Machine.
- Click Next.
- Select Place all certificates in the following store and click Browse.
- Highlight Trusted Root Certification Authorities and click OK.
- Click Next then Finish.
If the returned response is “The import was successful” continue with this procedure, else retry the certificate import.
Step 7: Enable HTTPS in the Sage 300 Connector Connection
For Existing Connections
Existing connections to this particular Sage 300 Connector Agent must be changed to use HTTPS; do the following:
- Open the connection’s global configuration.
You may experience a delay before the configuration opens as the Sage 300 Connector waits for the connection to the Agent to timeout first.
- From the Agent Connection tab, click Advanced.
- Enable Use HTTPS.
- If communication is over a custom TCP port number (default of
4207), enable Set custom port number and enter the new port number below. - Click OK.
- Go to the Company tab.
- You must re-select the Company database the Agent is monitoring.
- Click OK.
For New Connections
New connections to this particular Sage 300 Connector Agent must be over HTTPS. When adding the global configuration for this Agent, do the following to ensure communication is over HTTPS:
- From the Agent Connection tab, click Advanced.
- Enable Use HTTPS.
- If communication is over a custom TCP port number (default of
4207), enable Set custom port number and enter the new port number below. - Click OK.


